Documentation Index
Fetch the complete documentation index at: https://docs.credibledata.com/llms.txt
Use this file to discover all available pages before exploring further.
What’s in this Quick Start?
You will learn how to:- Build a semantic model using an AI coding agent with Credible’s modeling tools
- Publish your work to the Credible service for broader consumption
- Analyze data via chat using Credible’s Context Engine and your published semantic model
Step 0: Get Set Up
Before starting, make sure:- A Credible admin set up your organization.
- You have a basic understanding of semantic models and Malloy, the language Credible is built on. View Malloy Docs →
Open a New Folder in Your IDE
Create a new folder and open it in your IDE (File → Open Folder).Install the Credible Extension & Log In
- Go to the Extensions view (
Cmd+Shift+X), search forCredible, and install the extension — select Auto Update when prompted - Open the Explorer (
Cmd+Shift+E), expand the Credible panel at the bottom of the sidebar, and click Login — then follow the steps in your browser - Back in your IDE, select your organization from the list (if you only belong to one, it’s selected automatically), then select the demo environment
Panel controls
Panel controls
The Credible Extension can be configured via the Command Palette (
Cmd+Shift+P) or clicking icons in the Credible Service panel:- Disable Credible: Turn off the extension for this workspace
- Refresh: Reload environments, connections, and packages
- Select Organization: Switch between organizations
- Sign Out: Log out of Credible
Credible-Modeling MCP Server
The Credible Extension registers an environment-scoped Credible-Modeling MCP server automatically — no manual enabling required.- Cursor
- VS Code
- Claude Code
The server is enabled automatically. To verify, open Cursor Settings (
Cmd+Shift+J on Mac, Ctrl+Shift+J on Windows/Linux) → Tools & MCP. The server appears as extension-Credible-Modeling — Cursor uses this naming convention to indicate it was registered by an extension.If the agent can’t call MCP tools, reload the window (Cmd+Shift+P → “Reload Window”).Step 1: Build a Semantic Model
Generate Your Semantic Model
For best results, set your Cursor LLM model to Claude Opus 4.6 (not “Auto”). Open Cursor Settings → Models and select Claude Opus 4.6.
What data is available to model?After reviewing what’s available, try:
Build a model of the ecommerce dataset
Review and Adjust Your Model
Open the generated.malloy model file.
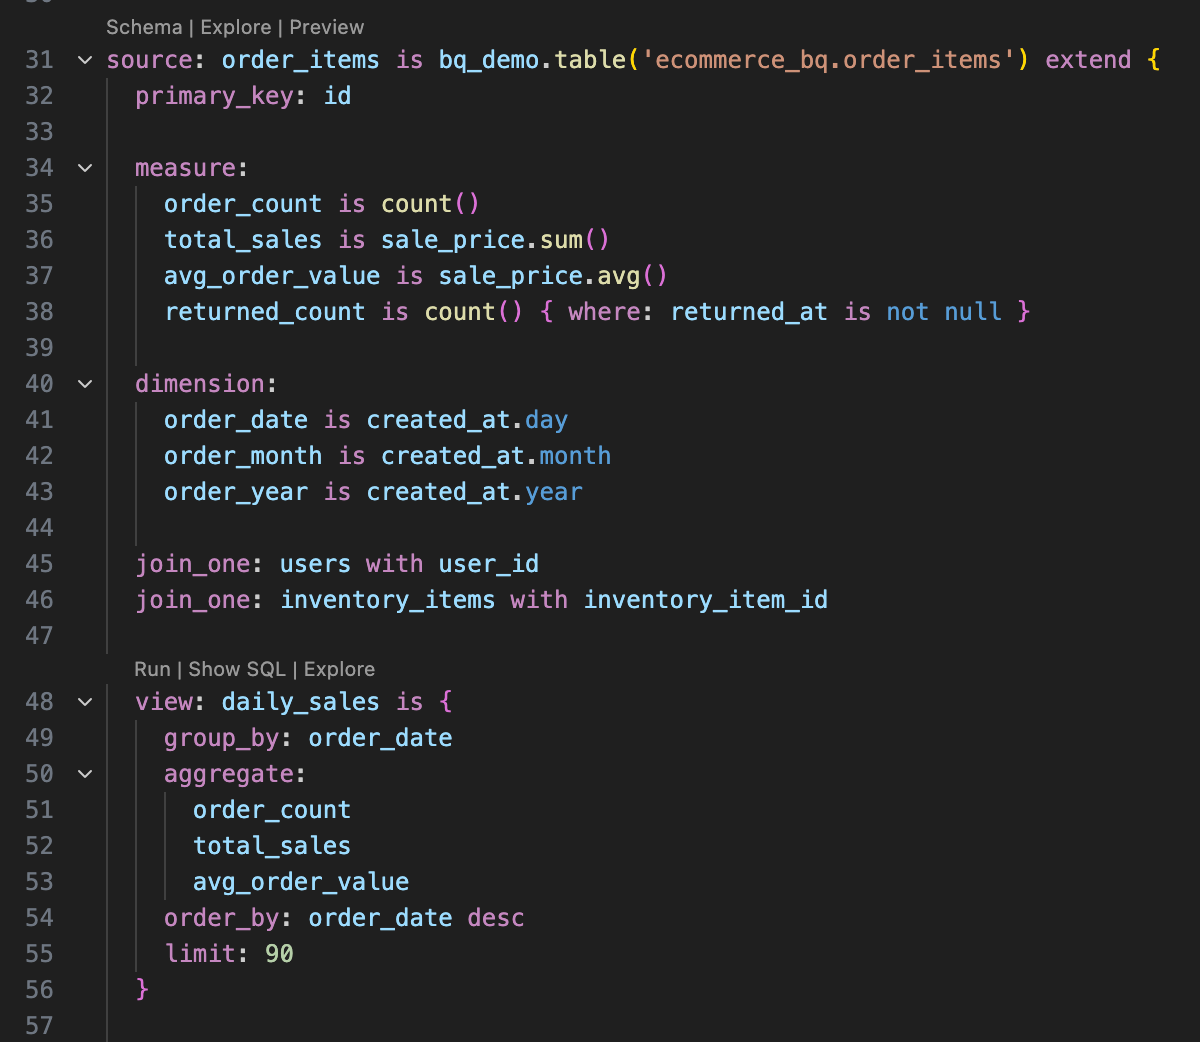
Understanding Malloy
Understanding Malloy
Above each source definition, you’ll see three buttons:
- Schema: View table structure and joins
- Explore: Open the Data Explorer
- Preview: See the first 20 rows
Step 2: Publish to the Credible Service
When your model looks good, ask the agent to publish your model (it has an MCP tool for this).Learn more about publishing
Learn more about publishing
- The
--set-latestflag pins this version as the default for consumers. Omit to publish without pinning. - Published packages are accessible to any agent or workspace with the correct permissions.
- Publishing makes your package ready for enterprise-scale serving via the Credible service.
- For details on versioning, see Understanding Package Versions.
- For best practices on organizing environments and packages, see Environments & Packages.
Step 3: Analyze Your Data
Now switch to the consumer experience: chat with your data in the Credible app. No data expertise required.Your model needs to be indexed before you can chat with it. You’ll see an alert in the chat if indexing is still in progress. You can also check indexing status on the environment page under Packages & Connections.
Start a Conversation
- Navigate to
https://<your-org>.app.credibledata.comand log in - Click + New Chat under your personal workspace, or use the chat bar
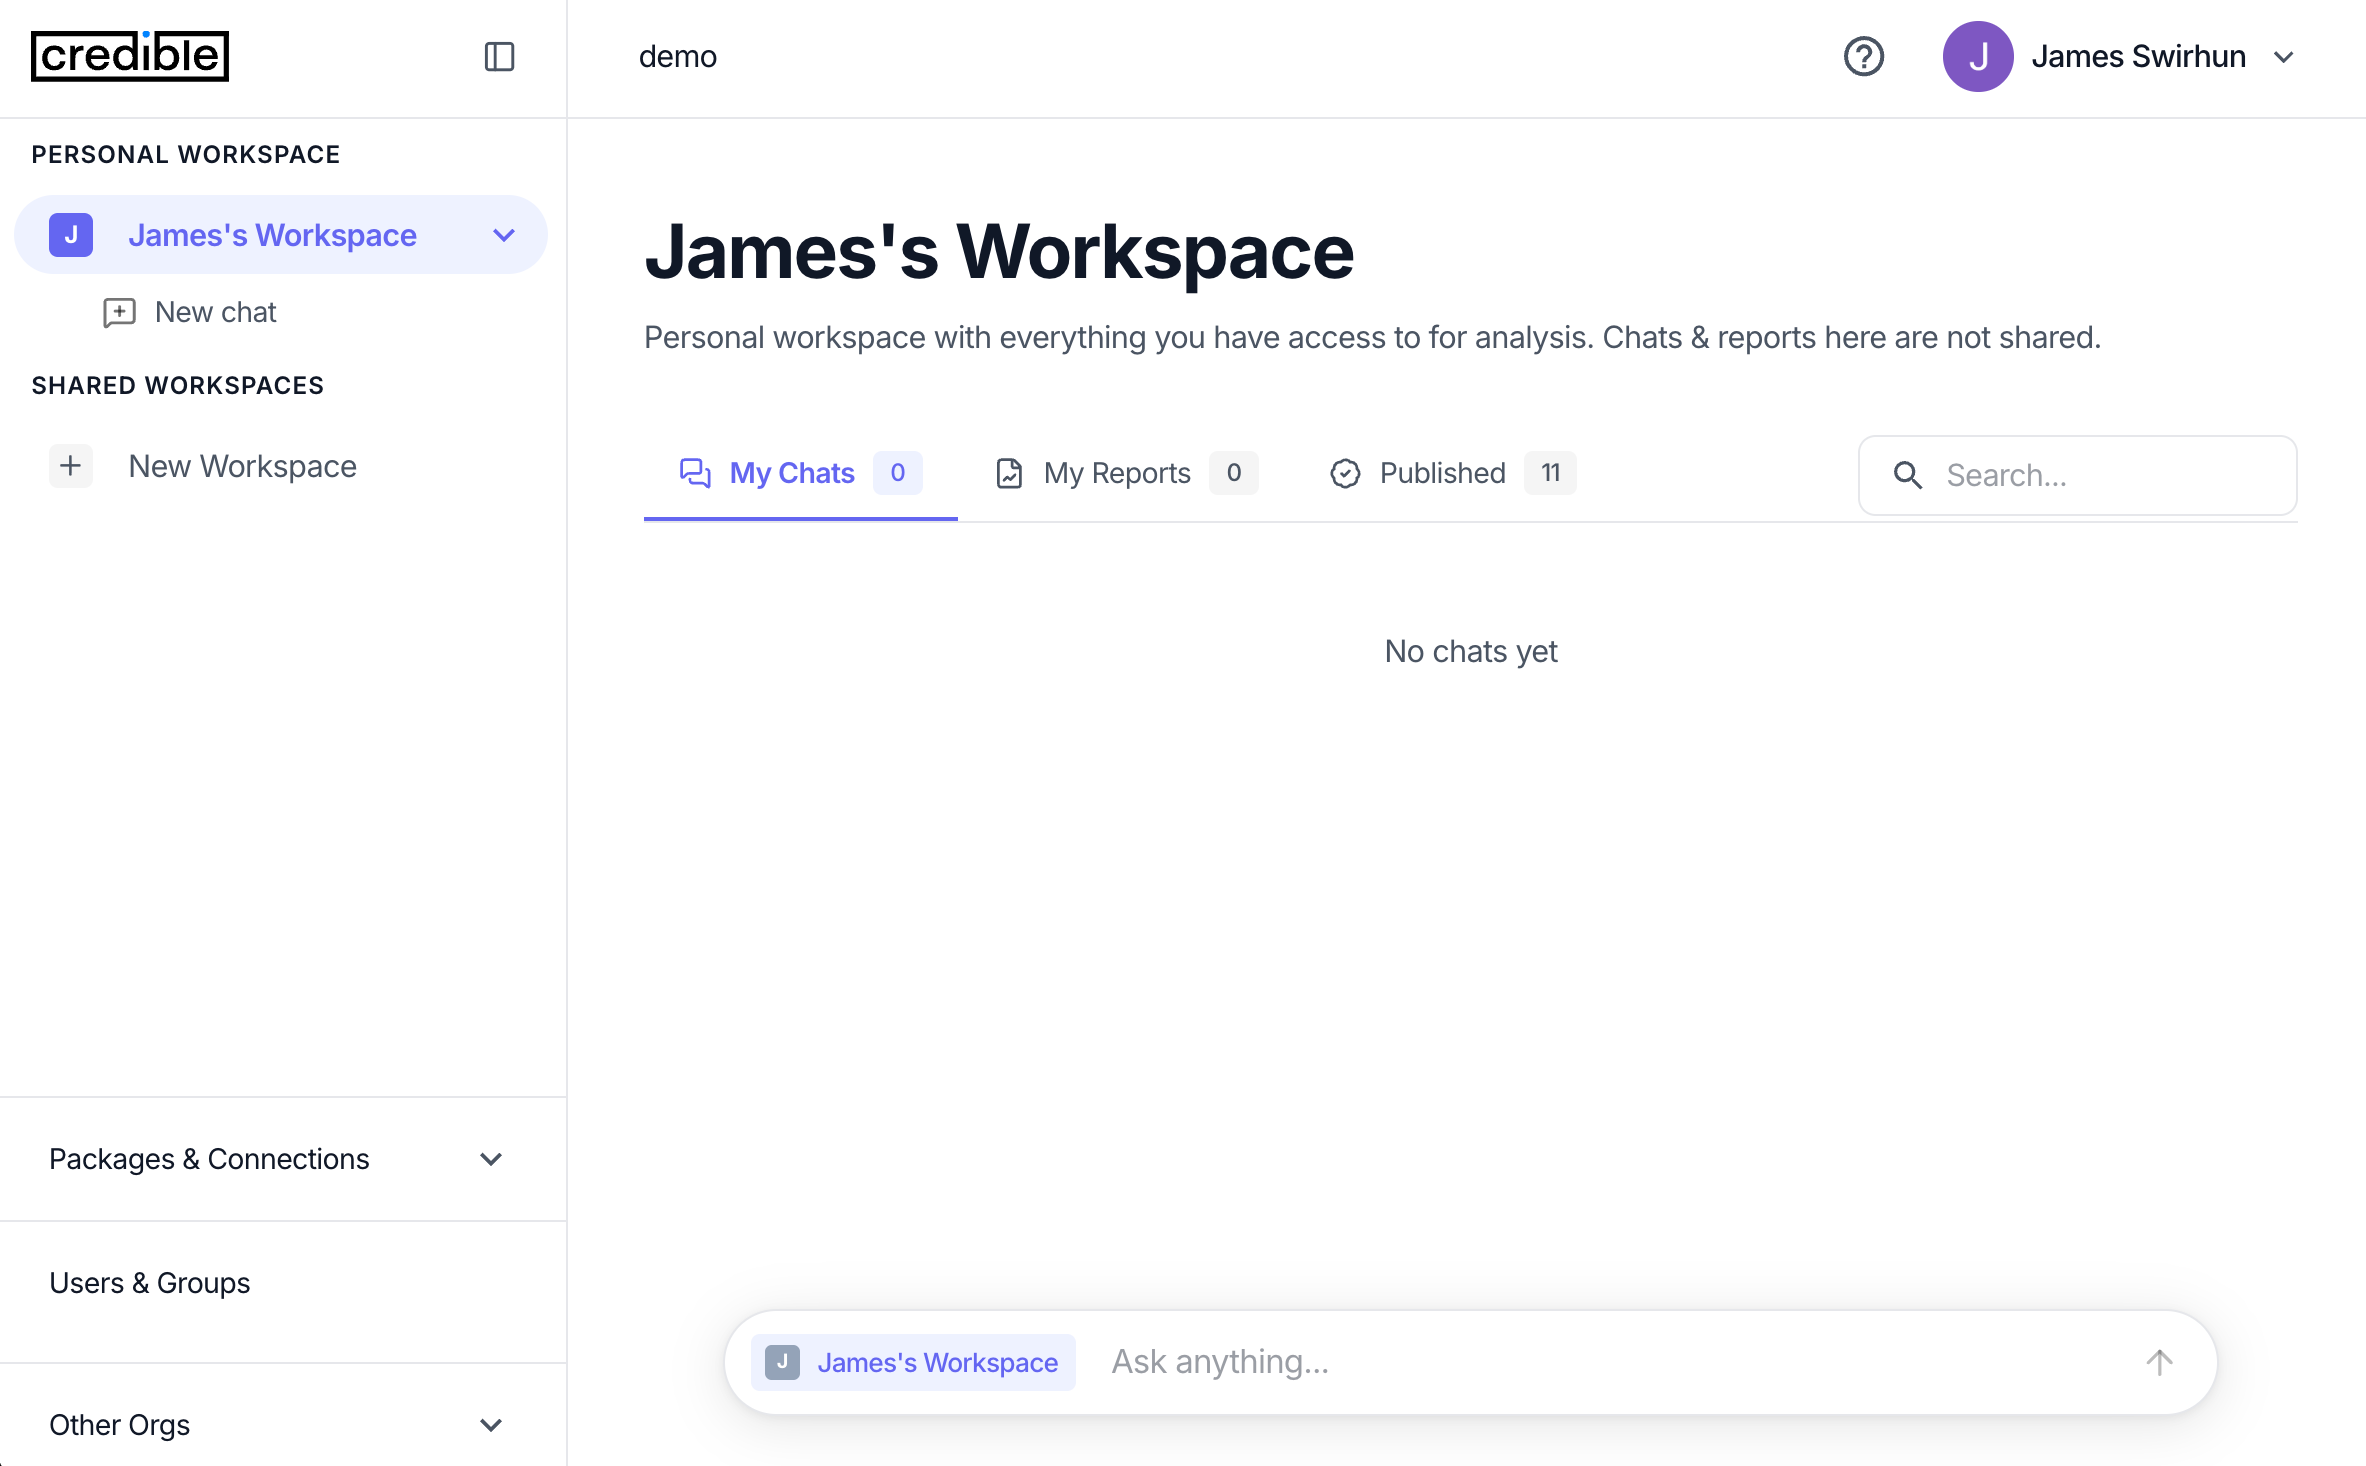
“Let’s analyze sales by brand for ecommerce data”
How workspaces work
How workspaces work
Your personal workspace automatically has access to models published in your environments. Chats and reports in your personal workspace are private to you. To share with your team, create a shared workspace and add packages to it. All chats and reports created in a shared workspace are visible to its members. Workspaces can contain individual users or groups, making it easy to manage access for teams, departments, or projects.
How the chat works under the hood
How the chat works under the hood
The chat agent uses two MCP tools:
get_context: The Credible Context Engine breaks your question into phrases and matches each to data entities in your semantic model. It returns ranked matches — dimensions, measures, views, relationships — grounded in the meaning you’ve encoded. These aren’t guesses; they’re precise matches.execute_query: Runs Malloy queries against your data and returns results.This is why answers are trustworthy — the agent is grounded in governed definitions, not interpreting or guessing. No wrong answers from bad joins or misunderstood field names.Generate a Report
After exploring your data, ask the agent to create a report:“Please generate a report of our analysis”Reports are saved to your workspace and can be shared with your team.
What You’ve Accomplished
- Built and published a semantic model using AI-assisted modeling
- Analyzed data through chat-based natural language queries
- Generated a report to share with your team
What’s Next?
Connect Your Database
Connect to BigQuery, Postgres, Snowflake, or other data sources
Connect Your LLM
Connect LLMs like Claude or ChatGPT to query your semantic models via MCP