Prerequisites
- Admin access to an organization in the Credible platform, in order to create environments and connections. If you don’t have it, ask your organization administrator to set up connections for you.
Setup Process
Credible App (Recommended)
- Access your organization at
https://your-org.app.credibledata.com - Select your environment from the left sidebar under Packages & Connections
- Click ”+ Add Connection” in the Connections section
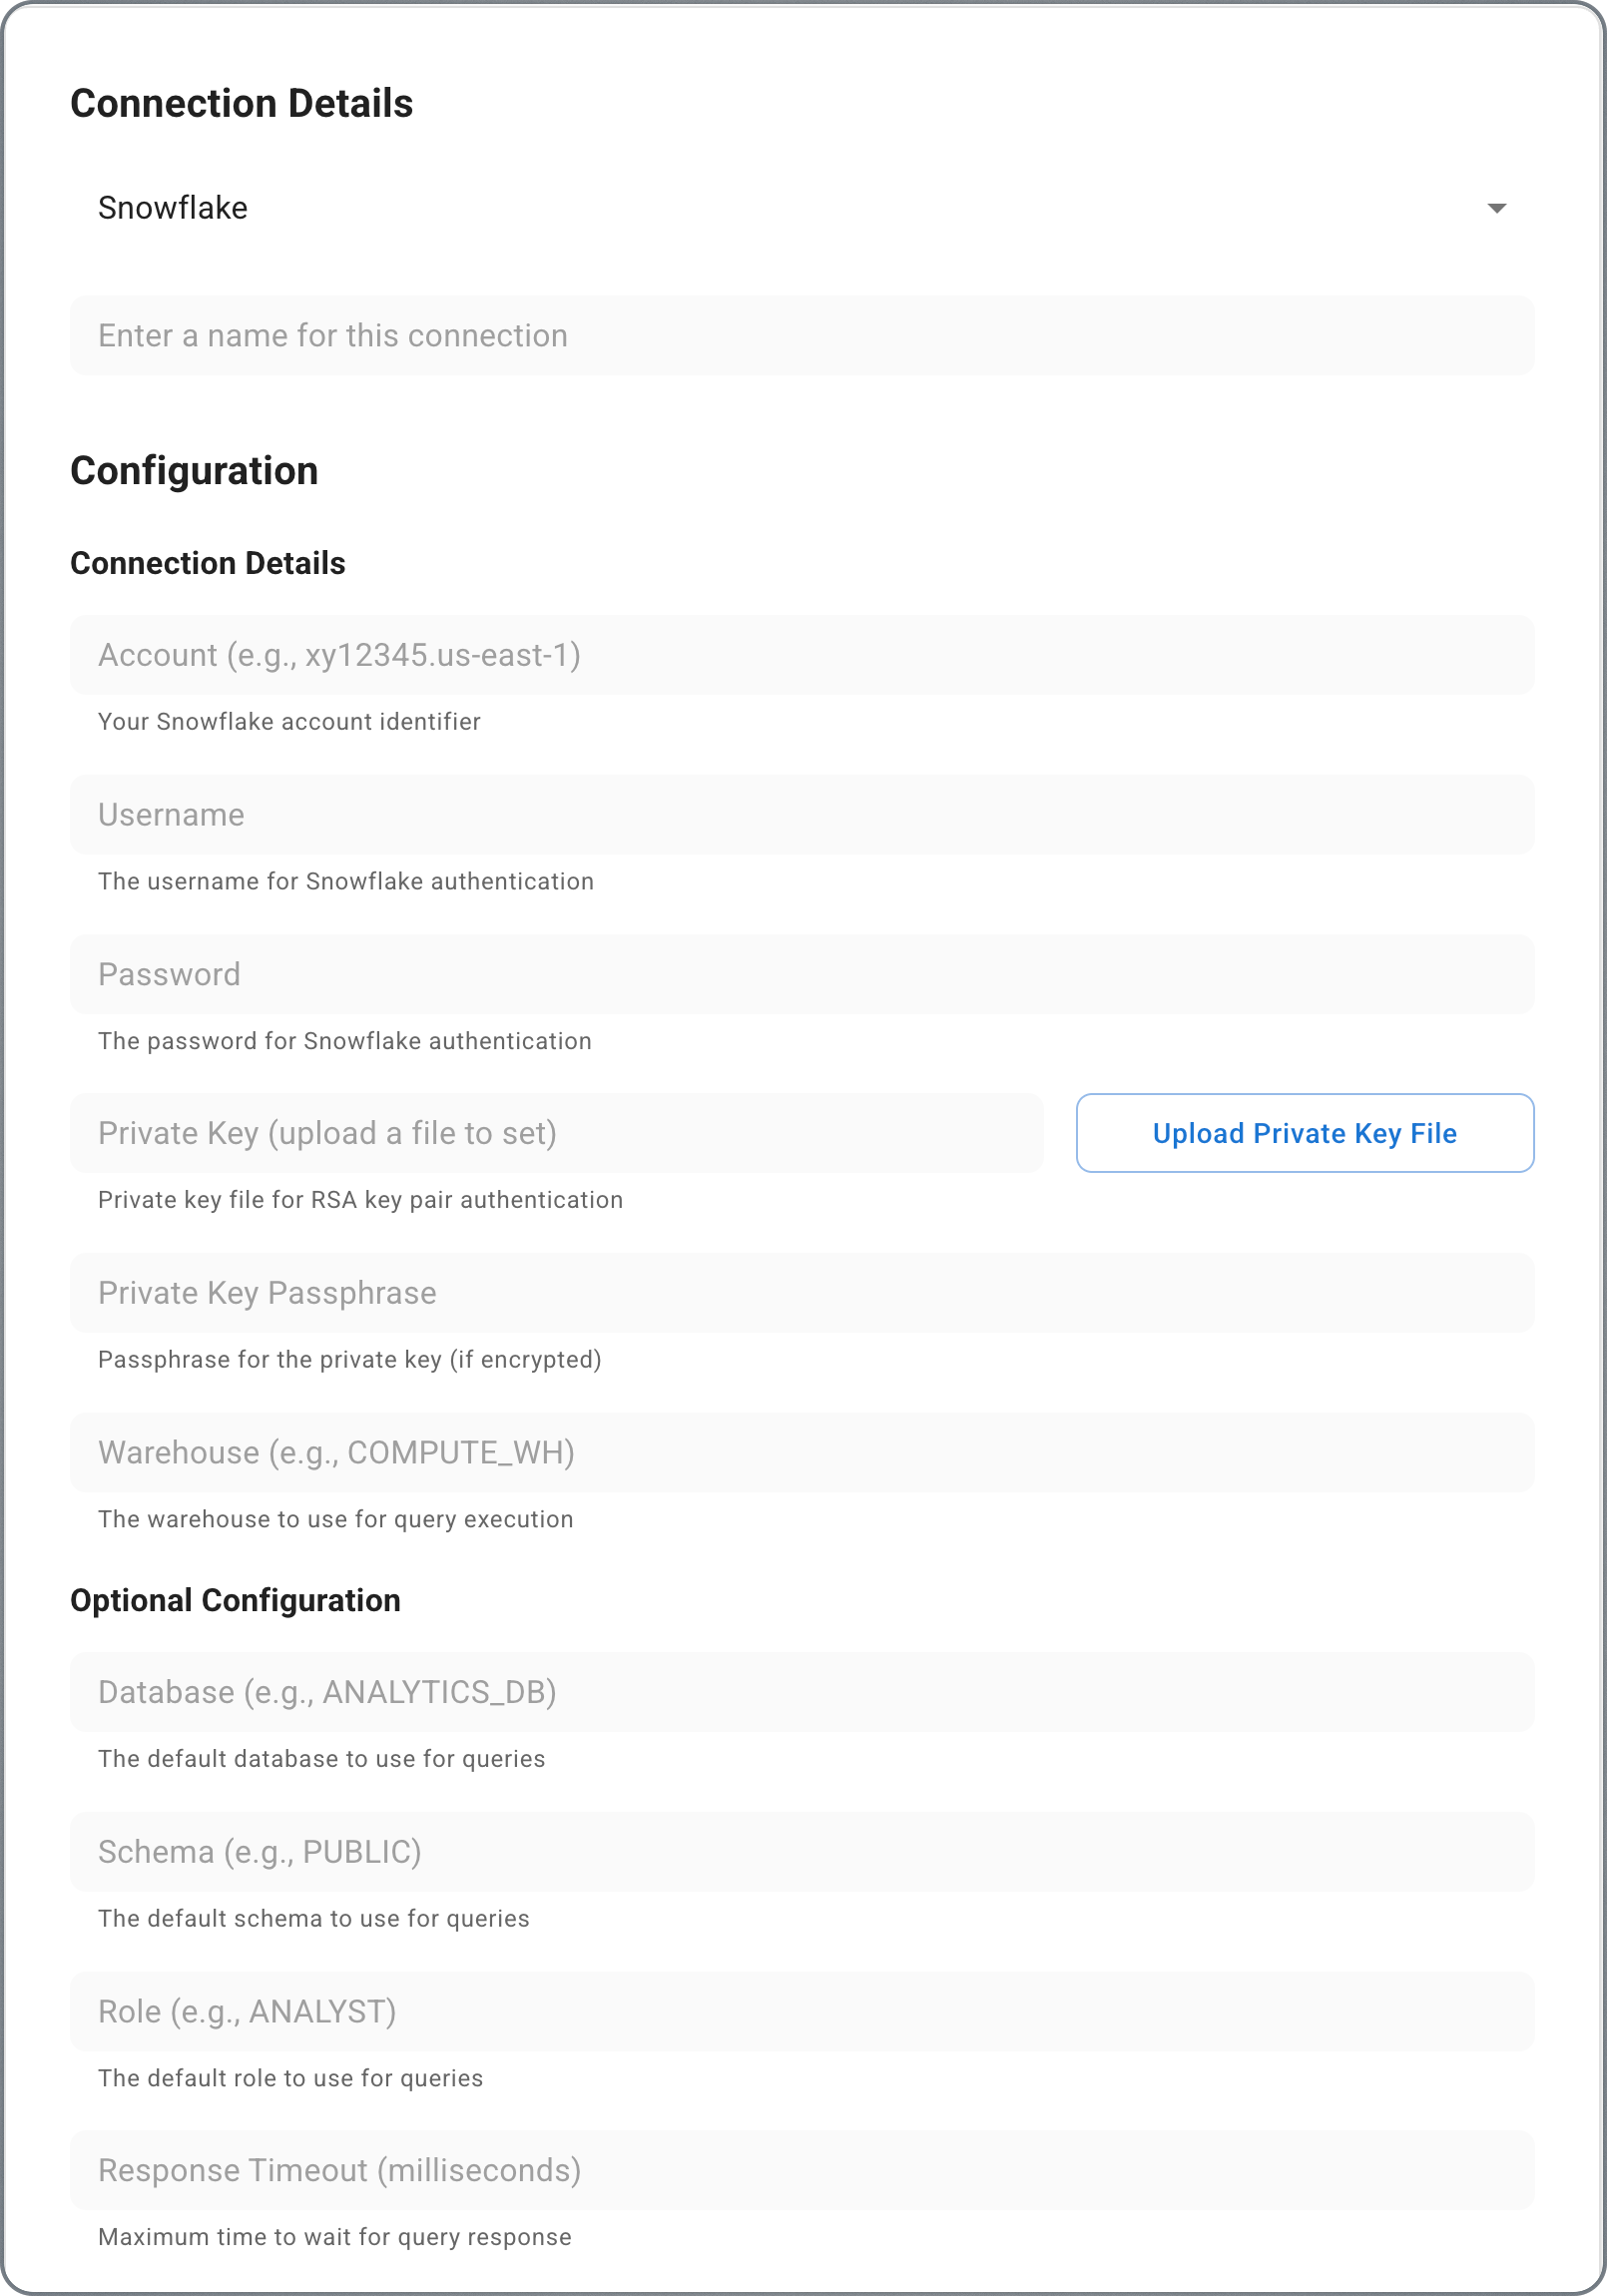
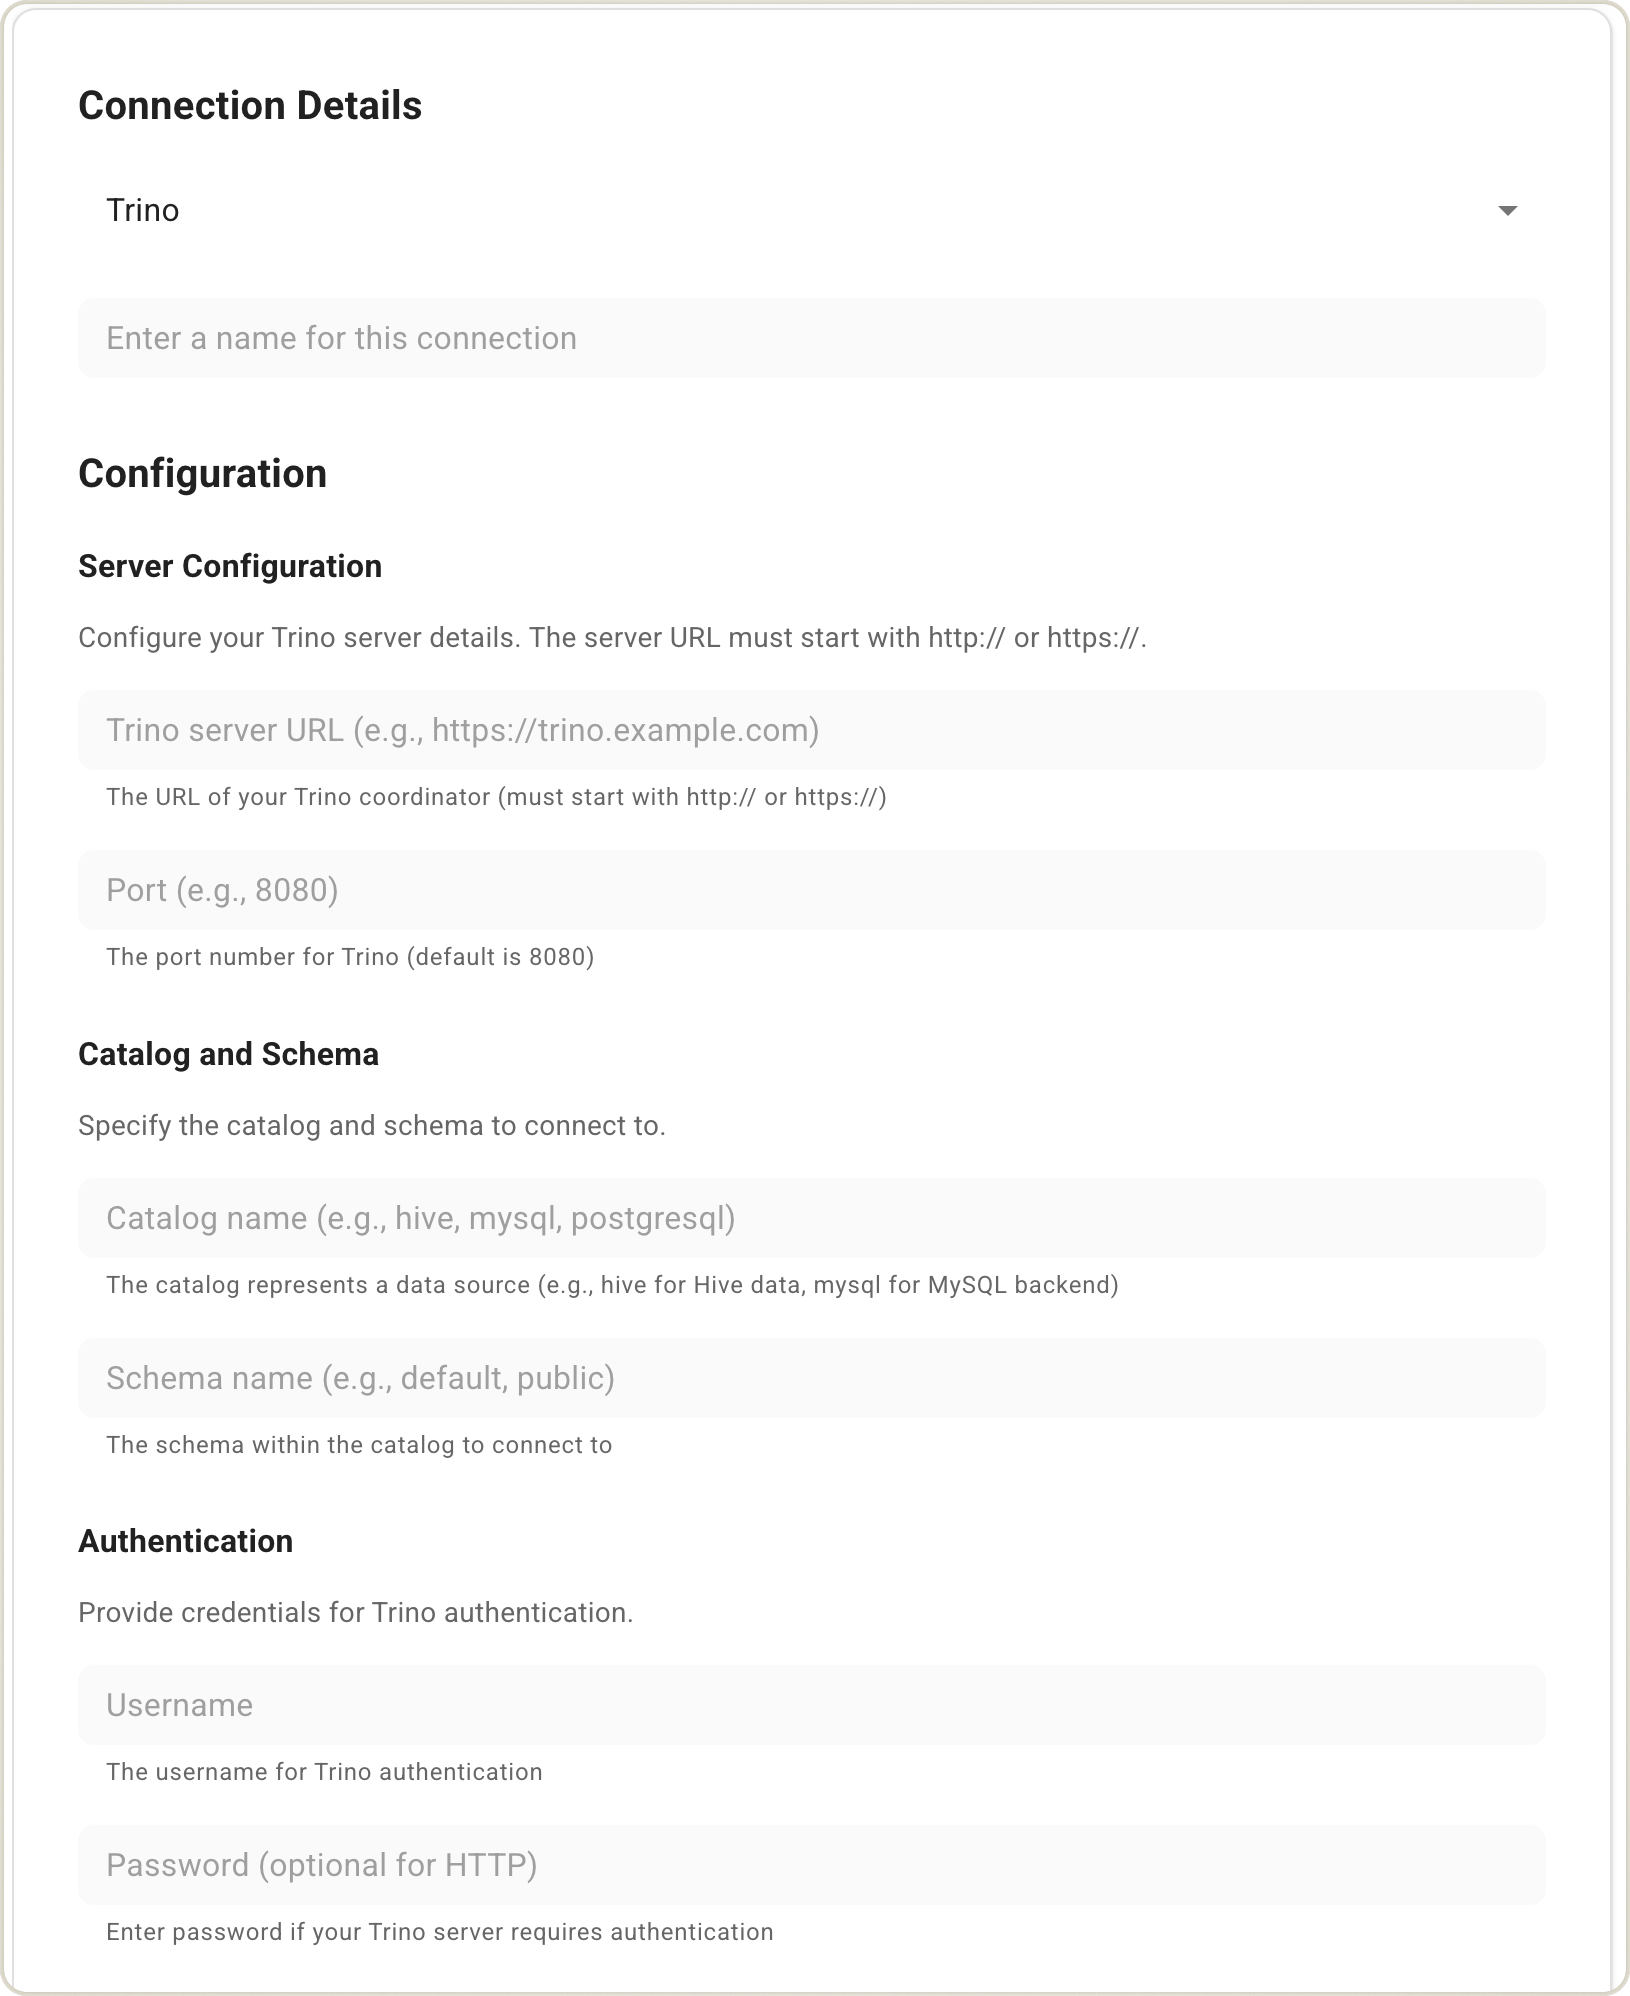
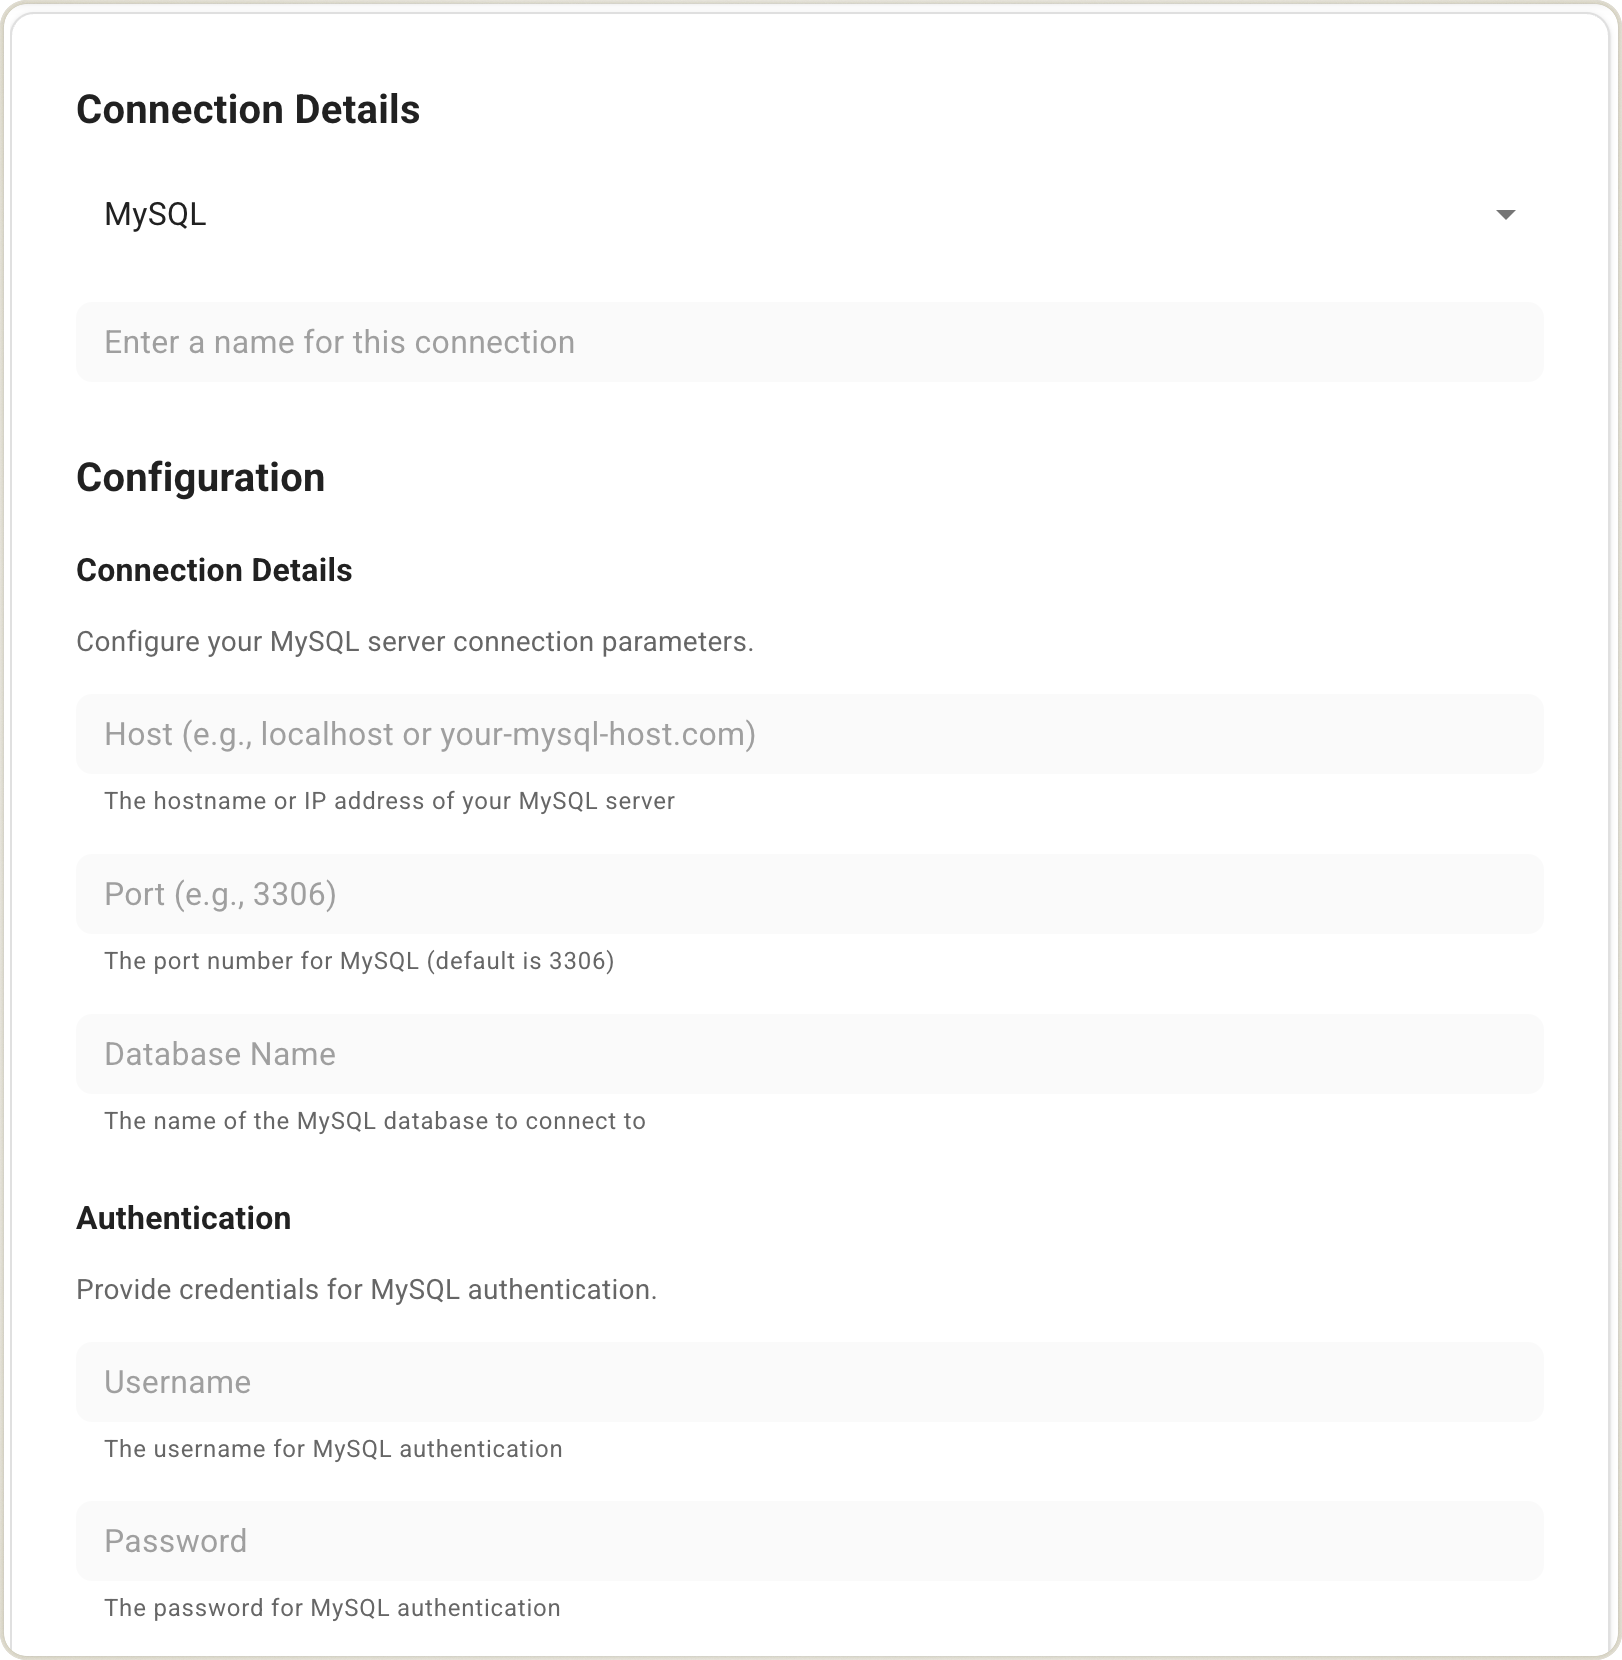
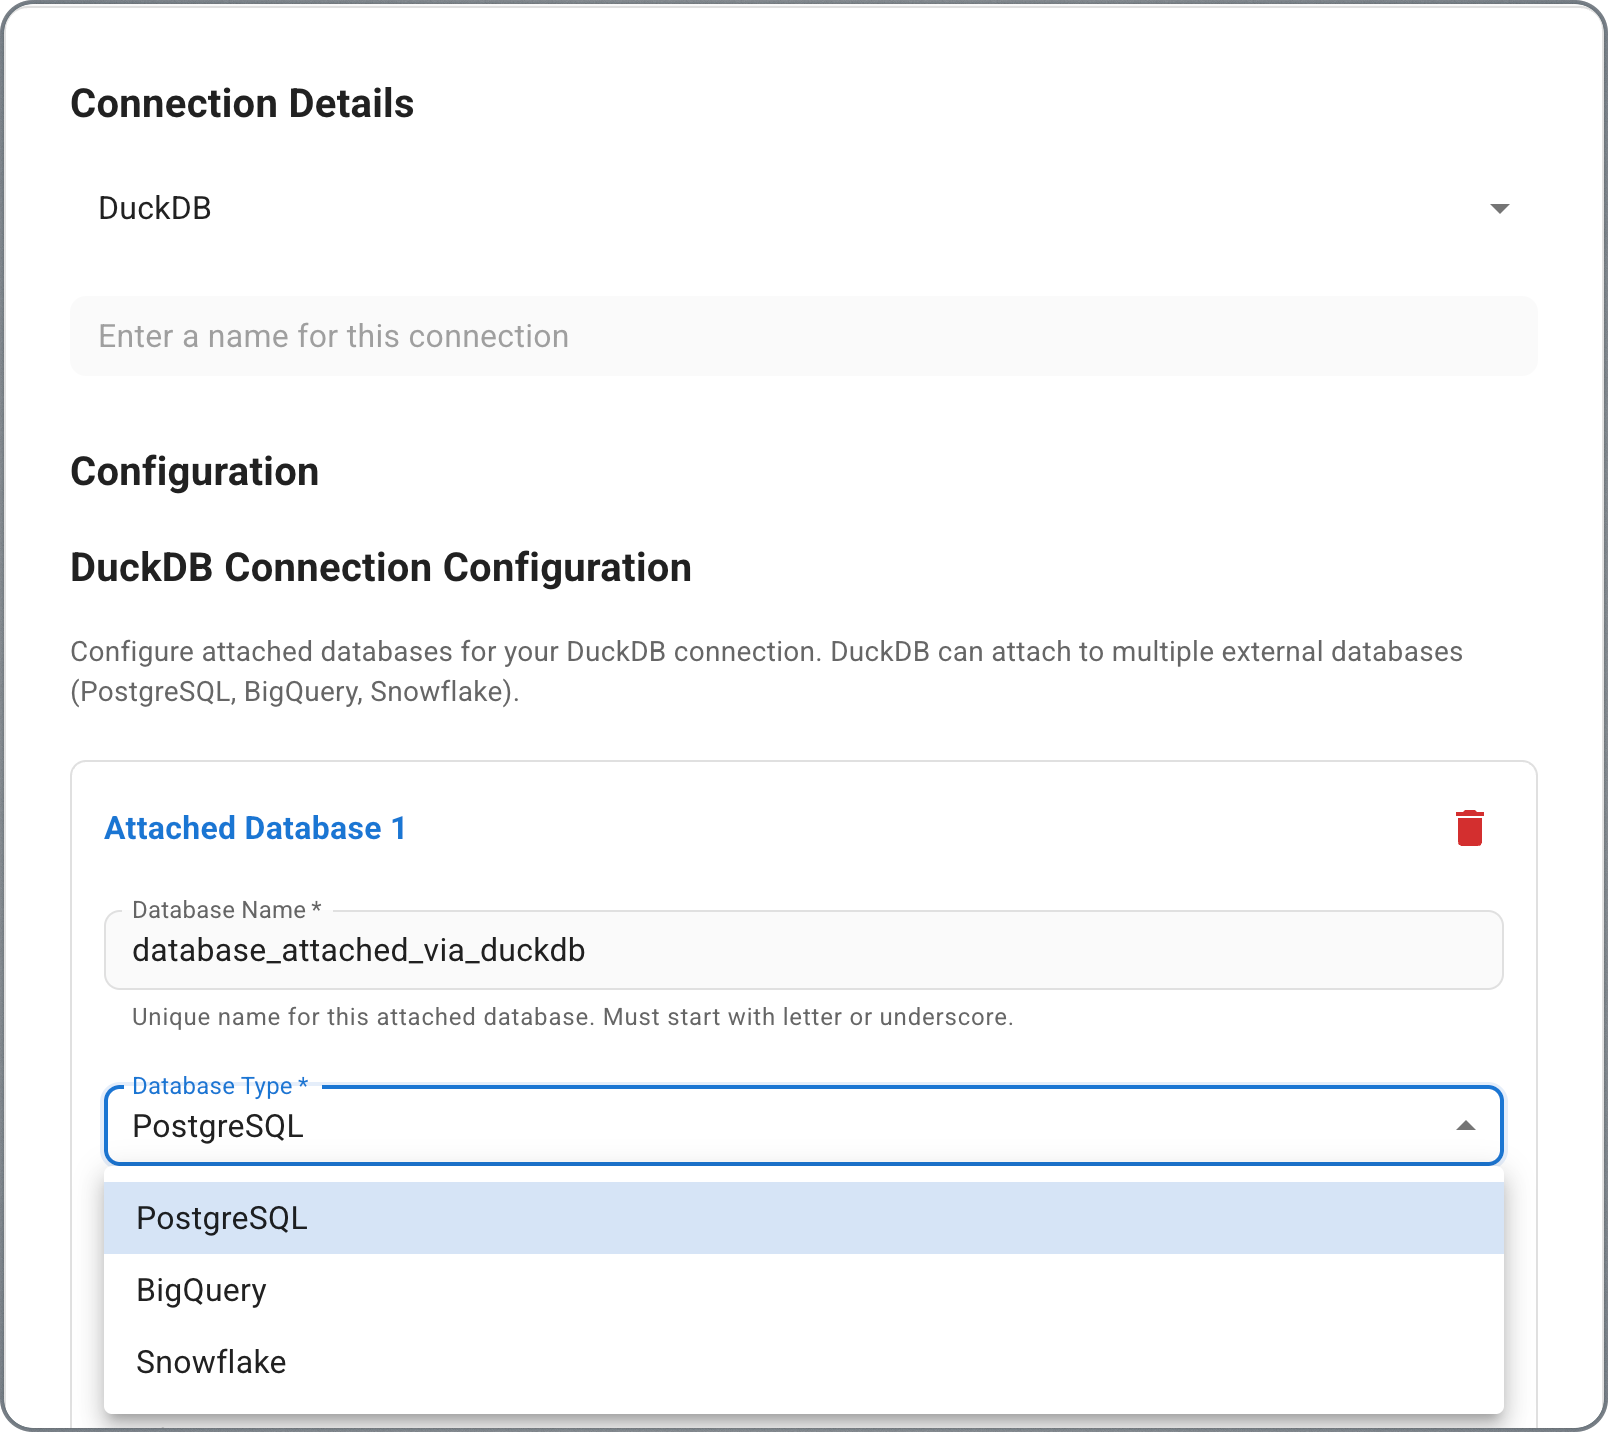
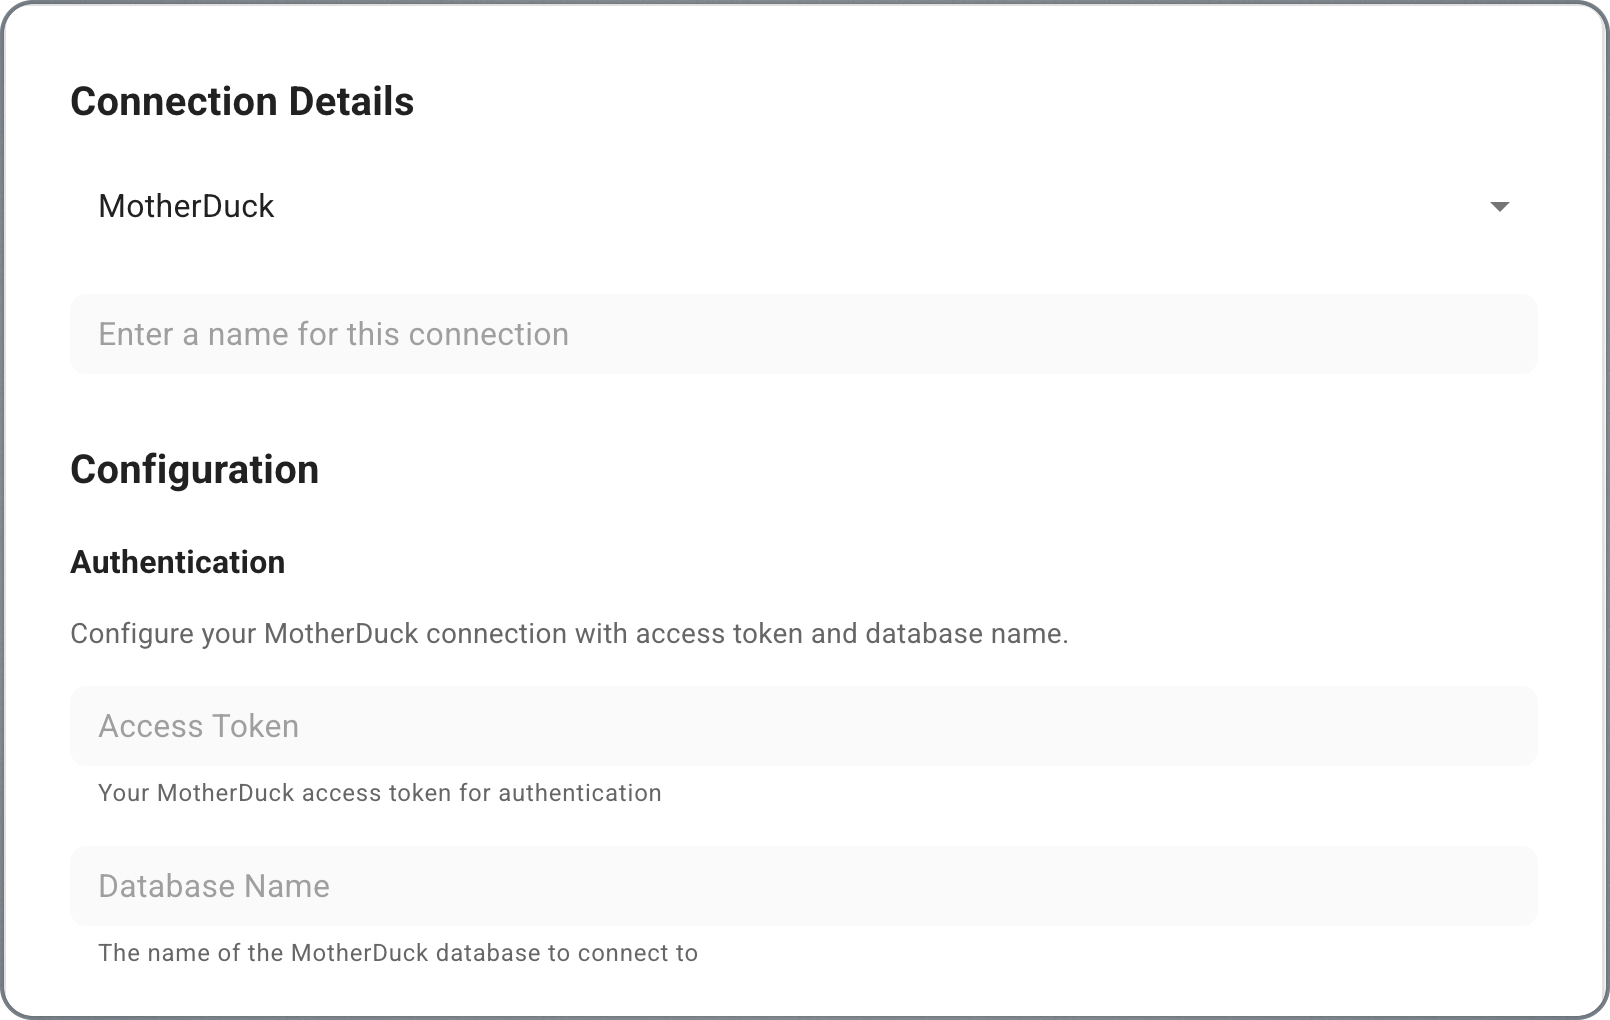
- Choose your data source type and fill in the connection details:
Connection names cannot contain spaces or hyphens. Use underscores instead
(e.g.,
my_connection).- BigQuery
- PostgreSQL
- Snowflake
- Trino
- Databricks
- MySQL
- DuckDB
- MotherDuck
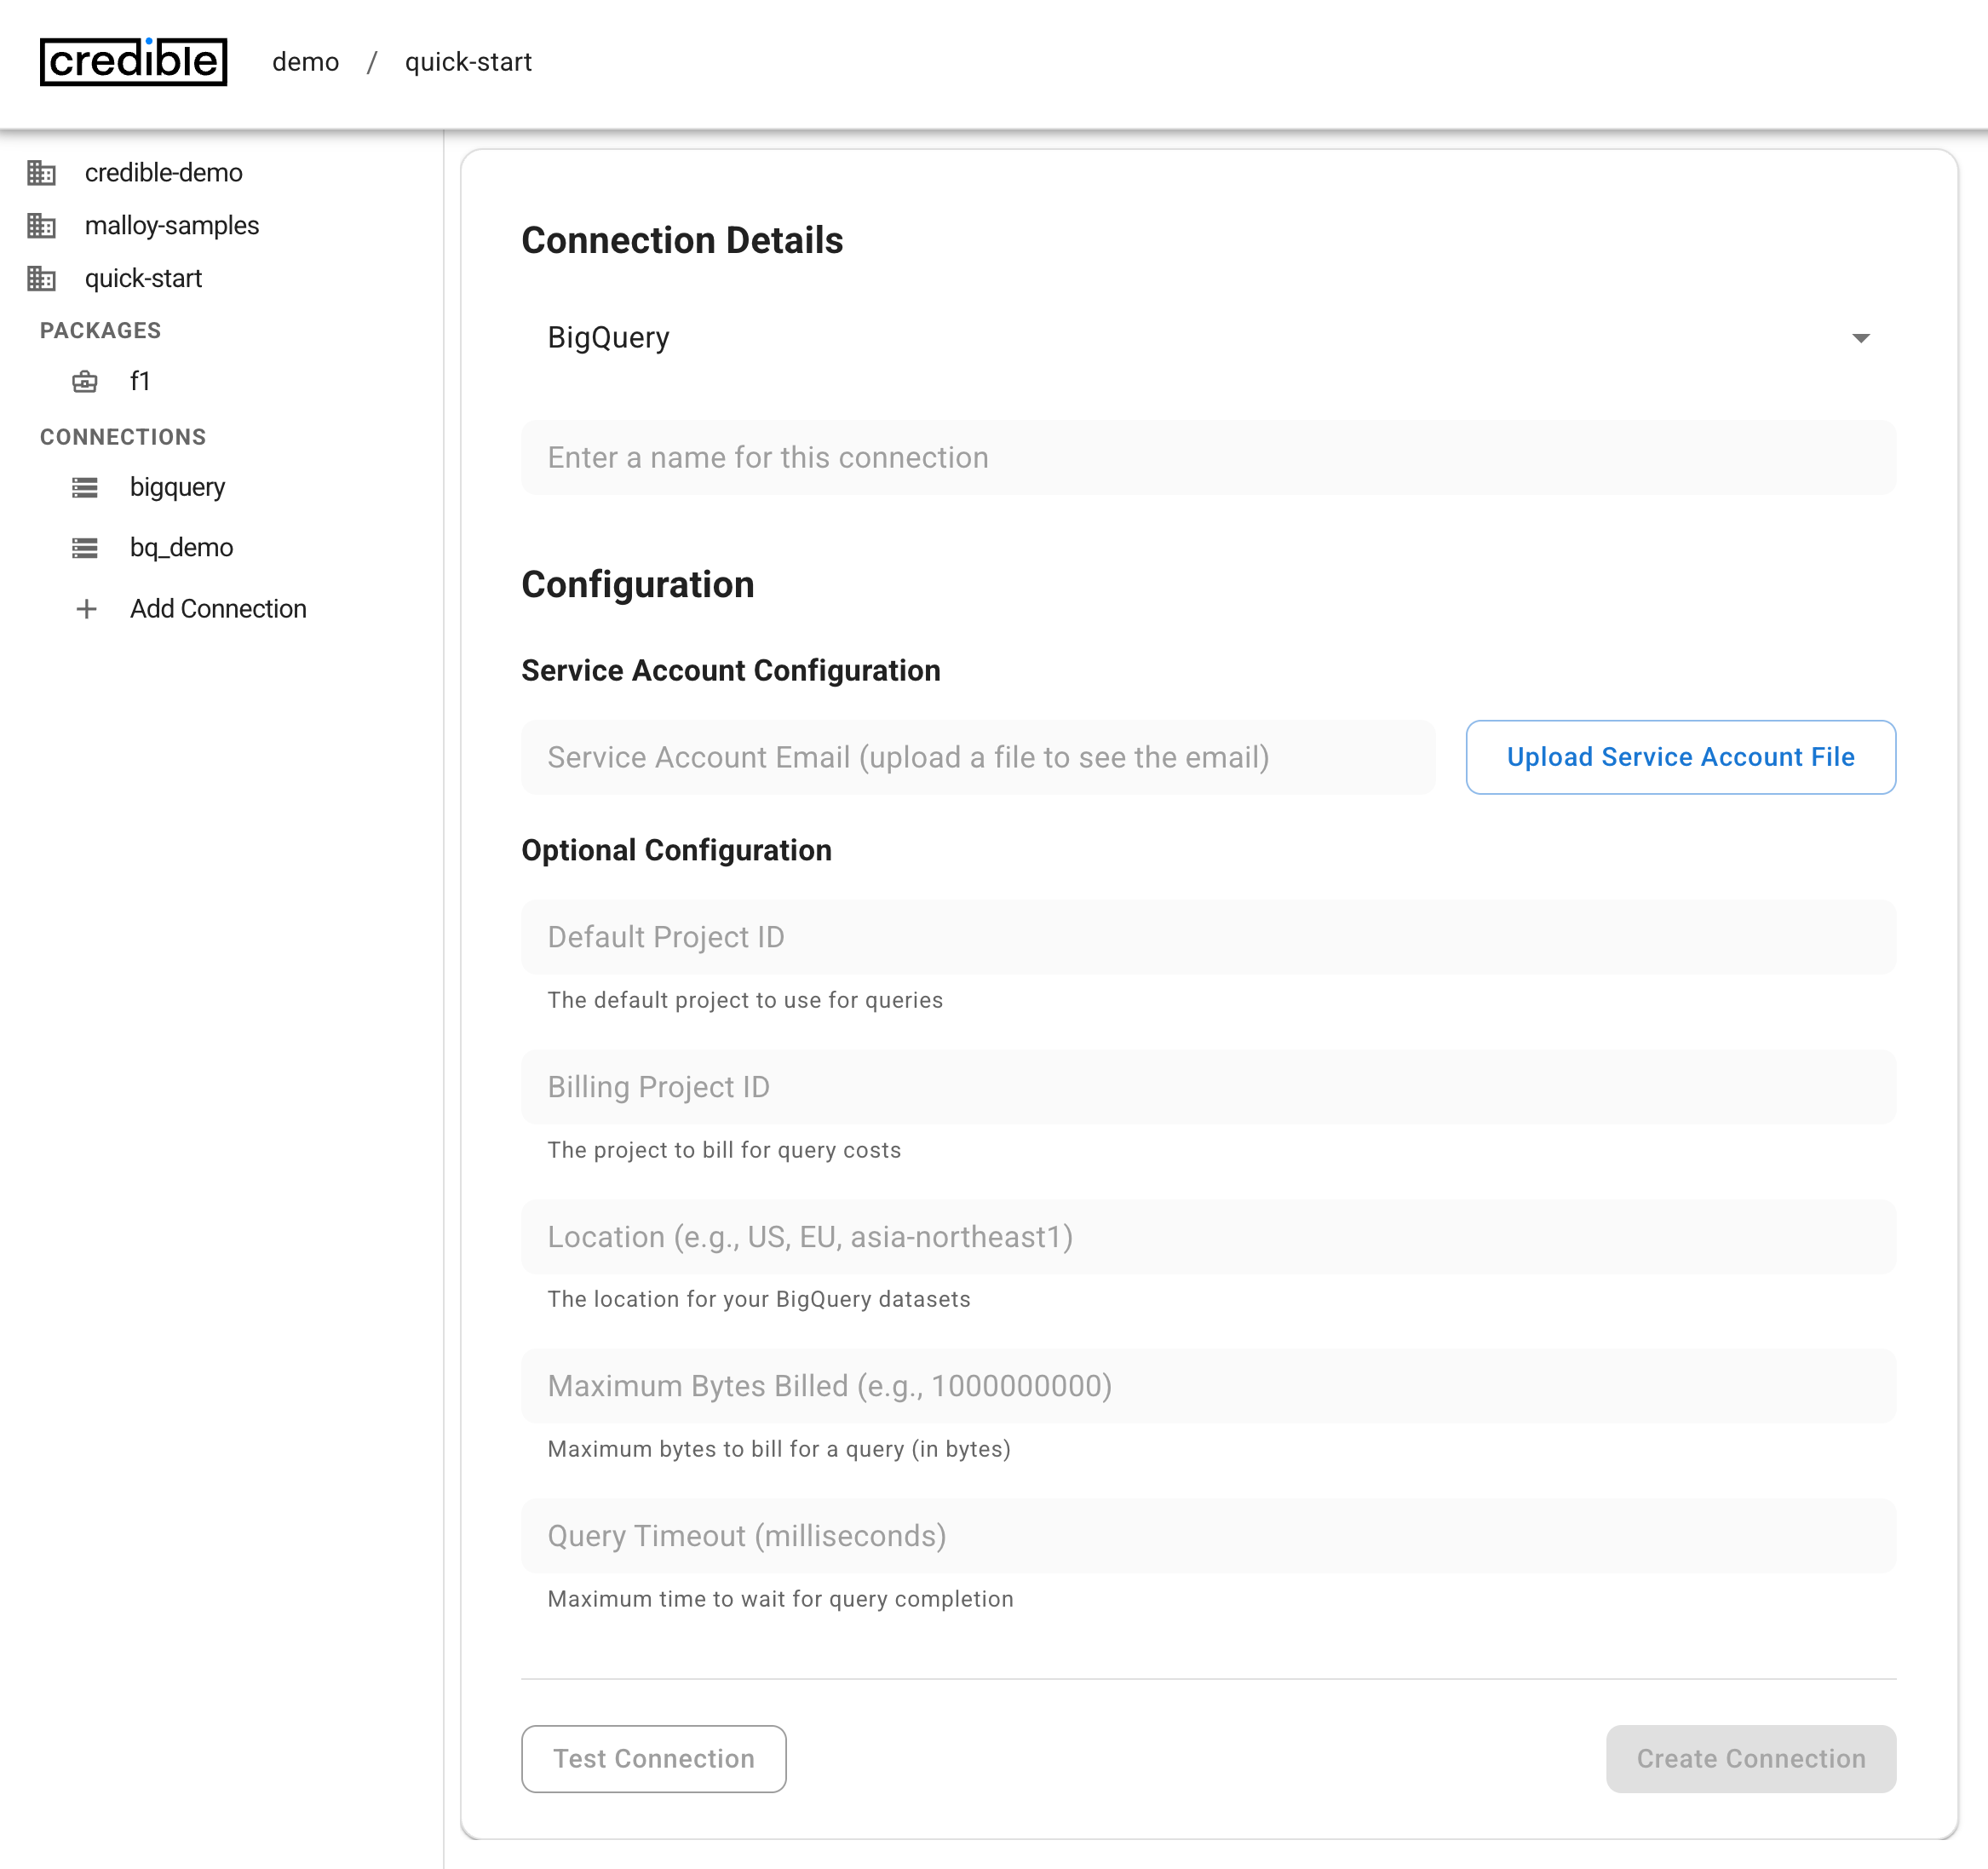
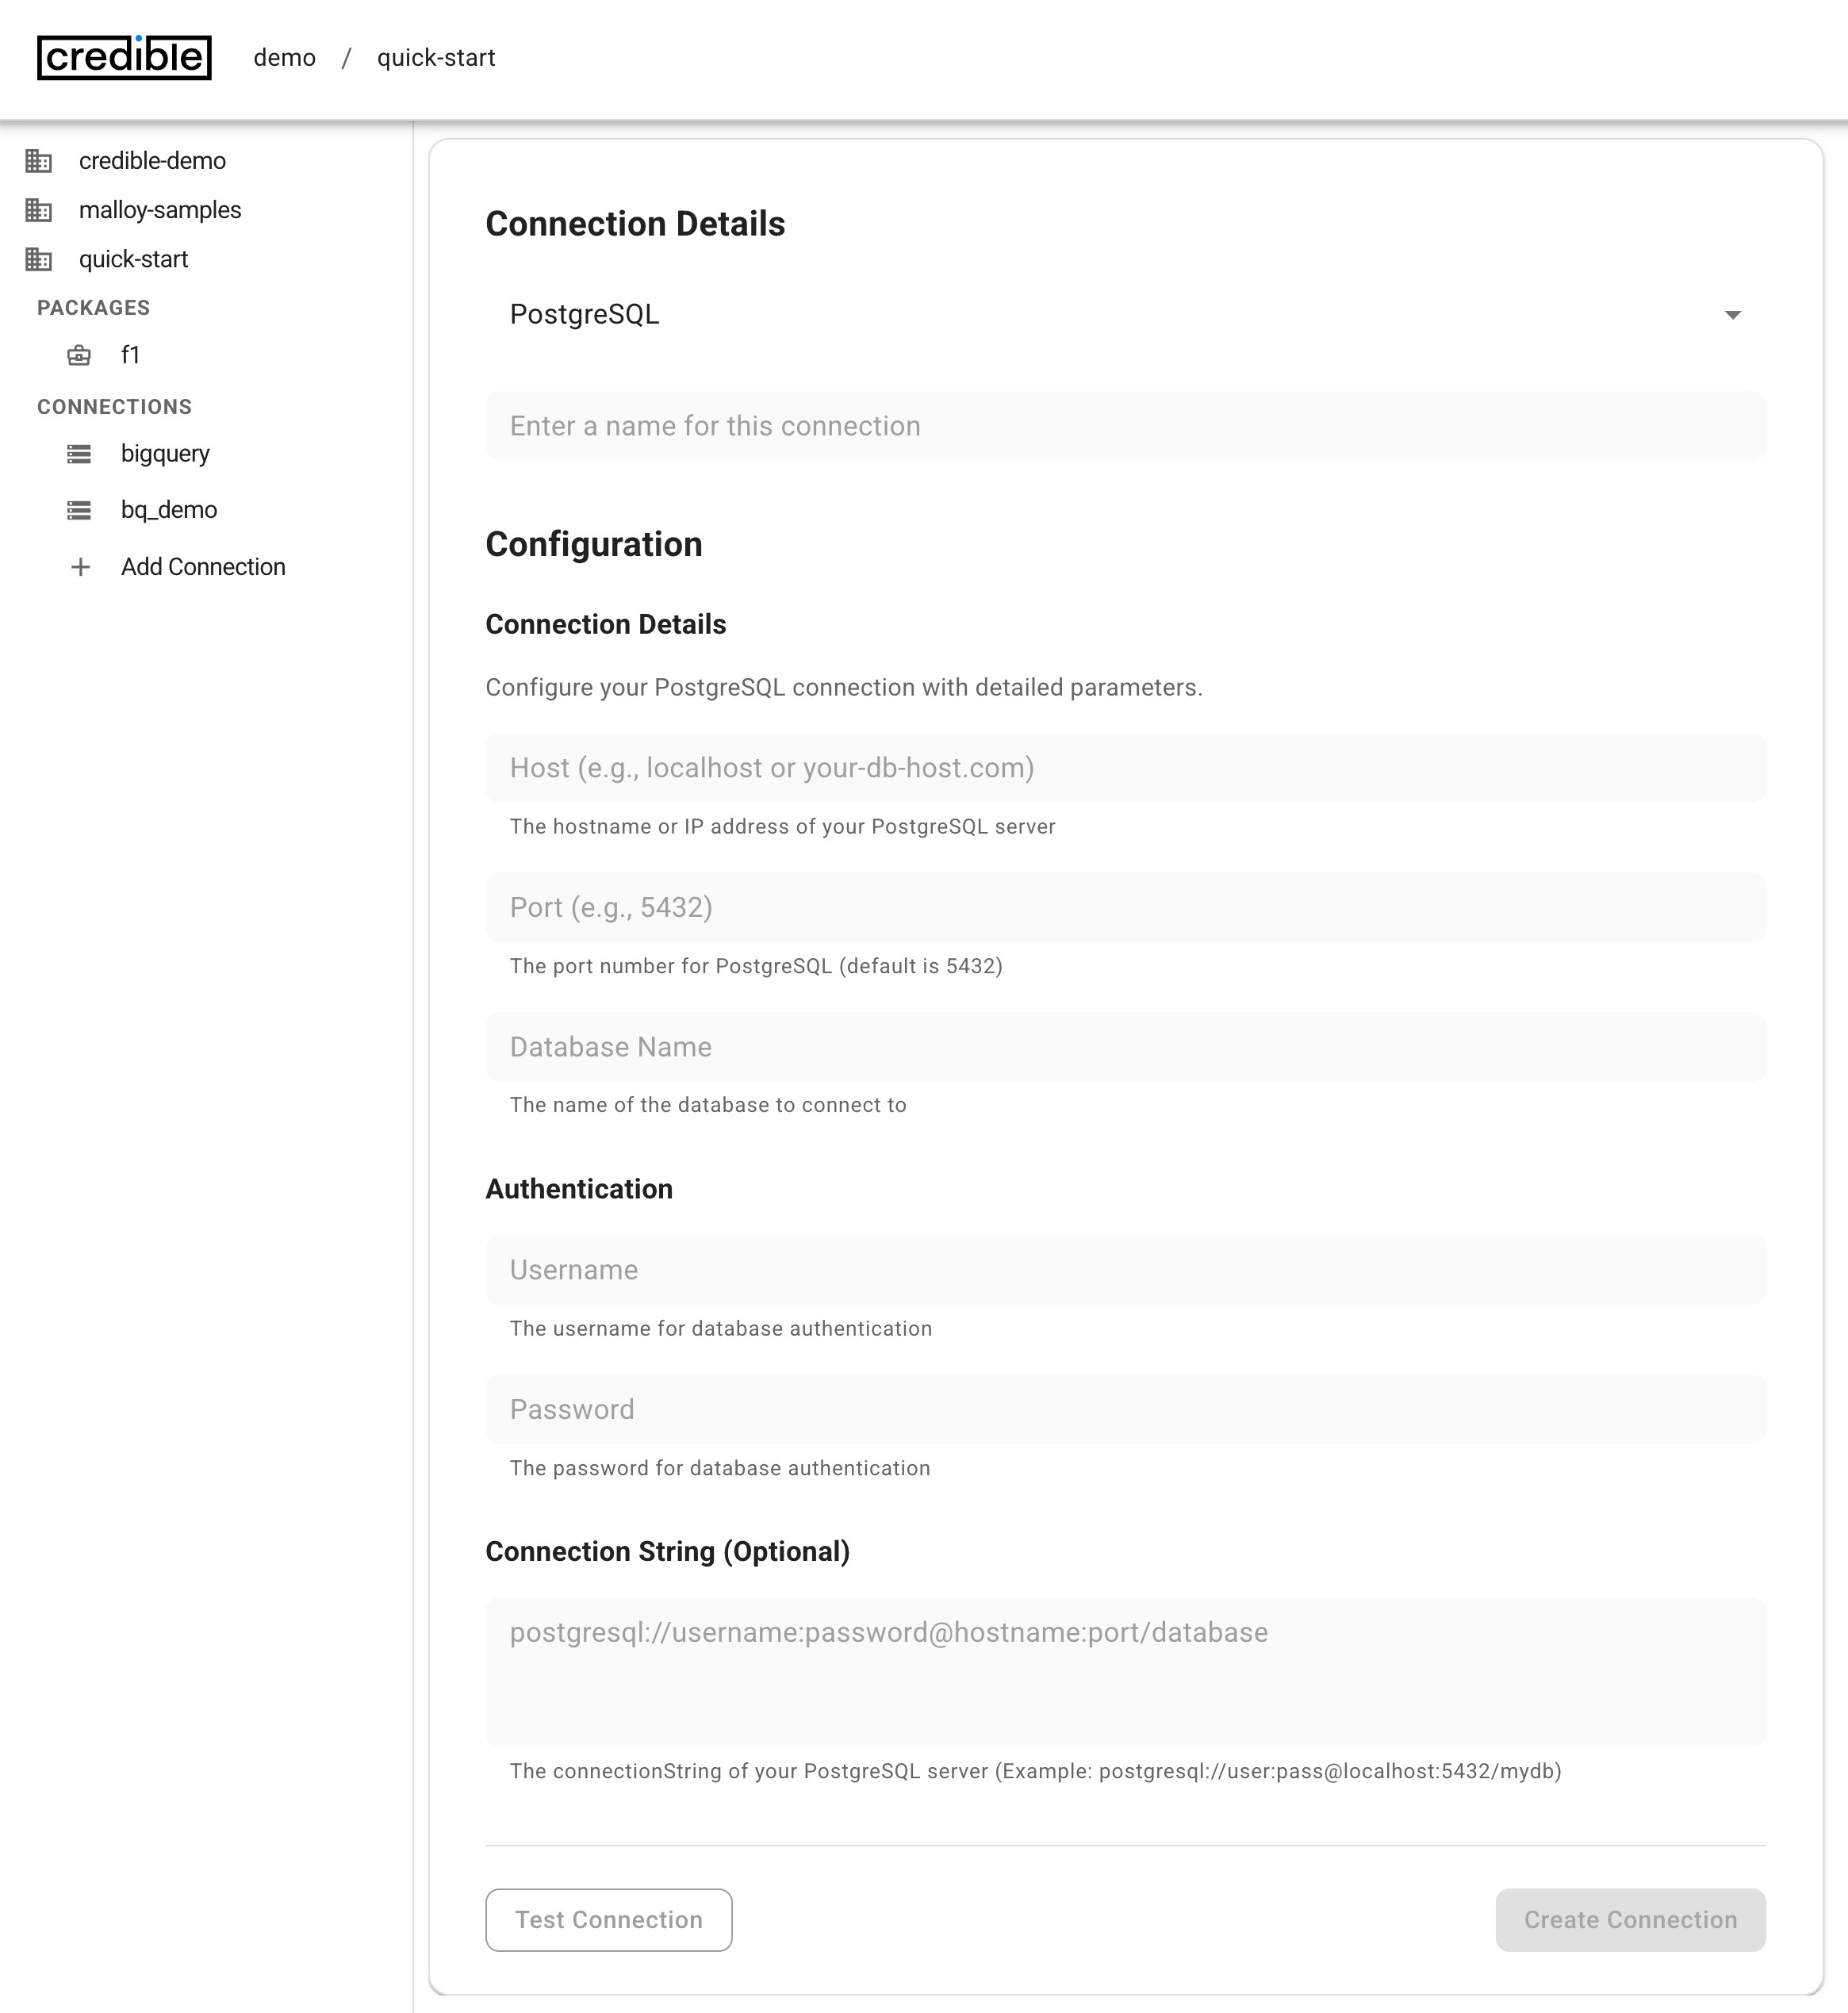
- Test the connection
- Click Next: Configure Scope

Configure Scope for AI-Assisted Modeling
Next, select which schemas and tables to index for AI-assisted modeling:
- Browse schemas on the left, select tables on the right
- Use Select All to include all tables in a schema, or pick individual tables
- Check “Do not include any tables for AI-assisted modeling” if you only need the connection for manual queries
These indexing limits apply to AI-assisted model creation:
- 100 tables per schema for metadata indexing
- 25 tables or fewer for automated join inference

CLI Option
Use the Credible command-line tool for programmatic connection management and automation.-
Install the CLI:
-
Login to your organization:
-
Add a connection:
The connection file should be a JSON file containing an array of connection objects. See the CLI reference for detailed connection file formats and examples.
-
Configure scope (optional): Control which tables are indexed for AI-assisted modeling with scope flags on
cred add connection. Tables are referenced as{dataset/schema}.{table}, and*matches all tables in a schema:--include-tablesand--exclude-tablesare mutually exclusive (and cannot be combined with--skip-indexing).
Scope flags apply at connection creation. To change the scope of an existing connection, edit it in the Credible App (see Configure Scope above).
Next Steps
With your data connected, pick how you want to build models:Build & Publish
Build models with the agent in your browser — no setup, recommended to start
Developer Overview
Build in your IDE with your preferred coding agent