> ## Documentation Index
> Fetch the complete documentation index at: https://docs.credibledata.com/llms.txt
> Use this file to discover all available pages before exploring further.
# Publishing
> Deploy your semantic models to production
When you're ready to serve your model to other users, you can publish it to the Credible platform. Published models can be accessed via:
* [MCP tools](/how-to/analyzing/ai-assistants-mcp) for AI assistants
* [Data APIs](/how-to/integrating/apis) for programmatic access
* [Publisher SDK](/how-to/integrating/embedded-analytics) for embedded analytics
Published models are organized into **packages**. A package is a folder containing your Malloy models, notebooks, and any embedded data files, and is published and versioned as a single unit.
Publishing also triggers indexing by the [Credible Context Engine](/concepts/context-engine), which makes your model available for consumption — see [Indexing](#indexing) below.
## Package Configuration
A package requires a `publisher.json` file that defines its metadata:
```json theme={null}
{
"name": "ecommerce",
"version": "0.0.1",
"description": "ecommerce demo data"
}
```
A package can contain:
* **`.malloy` files** - Semantic model definitions
* **`.malloynb` files** - Malloy notebooks for exploration and documentation
* **Data files** (CSV or Parquet) - Embedded data that gets published with your package (see [Embed Data Files](/how-to/modeling/embed-data))
### Curating Discovery
By default, every model is listed and every source is directly queryable. Add optional fields to `publisher.json` to narrow what agents see.
```json theme={null}
{
"name": "ecommerce",
"version": "0.0.1",
"description": "ecommerce demo data",
"explores": ["orders.malloy", "customer_health.malloy"],
"queryableSources": "declared"
}
```
#### `explores`
`.malloy` file paths (relative to the package root) whose models agents should discover and land on.
* **Omit** — discovery unchanged; every model and source stays listed.
* **Set** — listings narrow to these files, plus each file's `export { … }` closure.
#### `queryableSources`
Whether non-curated sources can still be queried by name. Only applies when `explores` is set.
| Value | Listing | Query by name |
| ---------------------- | ---------------- | ------------------------------ |
| `"declared"` (default) | Curated set only | Non-curated sources return 404 |
| `"all"` | Curated set only | All sources still queryable |
#### `export { … }`
`explores` filters which *files* are listed; [`export { … }`](https://docs.malloydata.dev/documentation/language/imports) filters which *sources within a file* are exposed. A file with no `export` exposes all its top-level sources; add `export { orders }` to keep imported or scaffolding sources out of discovery.
This curates **discovery**, not access — *what* is listed and queryable by name, not *who* may query. To restrict access by user or group, use [`#(authorize)` and secure givens](/platform-admin/fine-grained-acls).
**Hiding an `#(authorize)`-gated source.** An access gate blocks *querying*, not *discovery*, so a gated source still appears in listings to callers who can't query it. To hide it while keeping it queryable for authorized callers, leave it out of the curated `explores`/`export` set **and** set `queryableSources: "all"`. Under the default `"declared"`, the non-curated source returns 404 by name — which blocks authorized callers too.
## Publishing via Cursor Agent
The easiest way to publish is with the `/credible-publish` skill. Type `/credible-publish` in the agent chat — the agent will create a `publisher.json` if needed and run `cred publish --set-latest` for you.
## Publishing via CLI
You can also publish directly with the Credible CLI:
1. **Install the CLI** (if not already installed):
```bash theme={null}
npm i -g @credibledata/cred-cli
```
2. **Navigate to your package directory**:
```bash theme={null}
cd /path/to/your/package
```
3. **Login to Credible**:
```bash theme={null}
cred login
```
4. **Set your environment** (the CLI subcommand is still named `project` for backwards compatibility):
```bash theme={null}
cred set project
```
5. **Check the version**: Open the `publisher.json` file and confirm the version number
6. **Publish the model**:
```bash theme={null}
cred publish --set-latest
```
The `--set-latest` flag pins this version as the default "latest" version for consumers. Omit this flag to publish without pinning.
7. **Confirm the deployment**: Refresh the "Credible Service" panel in Cursor to verify that your new version appears
For comprehensive CLI documentation, see the [CLI Reference](/platform-admin/cli).
Want to automate publishing when changes are merged to Git? See [CI/CD Setup](/platform-admin/cicd) to configure GitHub Actions for automatic versioning and publishing.
## Understanding Package Versions
Each time you publish a package, you create a new immutable version. All versions remain available indefinitely, providing full version history and lifecycle management similar to software packages.
### Version Management
**Pinned Version (Latest)**: One version can be designated as "latest" - this becomes the default version served to consumers who don't specify a version. Consumers using "latest" automatically receive updates when you change the pin, unless they explicitly pin their application to a specific version (such as a dashboard that should remain stable).
**All Versions Remain Available**: Every published version is preserved, enabling rollbacks, pinned production deployments, gradual adoption across teams, and historical audits.
This version management approach treats semantic models as versioned software artifacts, giving you the same deployment safety and flexibility that modern software engineering practices provide.
### Viewing Published Versions
After publishing, you can view your package versions in two places:
* **Credible Service Panel** in Cursor — expand the panel to see your published packages, all versions, and which version is pinned as latest
* **Credible App** at `https://your-org.app.credibledata.com` — navigate to your environment and click on a package to see complete version history, pin/unpin versions, and view package metadata
## Indexing
After publishing, the [Credible Context Engine](/concepts/context-engine) indexes your model's dimensions, measures, views, `#(doc)` descriptions, and `#(index)` dimensional values. This indexing is what makes your model ready for consumption — whether through workspace chat, LLMs connected via MCP, custom agents, or any other consumer of the Credible platform.
Indexing typically takes around 10 minutes. You can check the status on your environment page or package page in the Credible App (`https://your-org.app.credibledata.com`) — look for a green **"Indexed"** tag on the package.
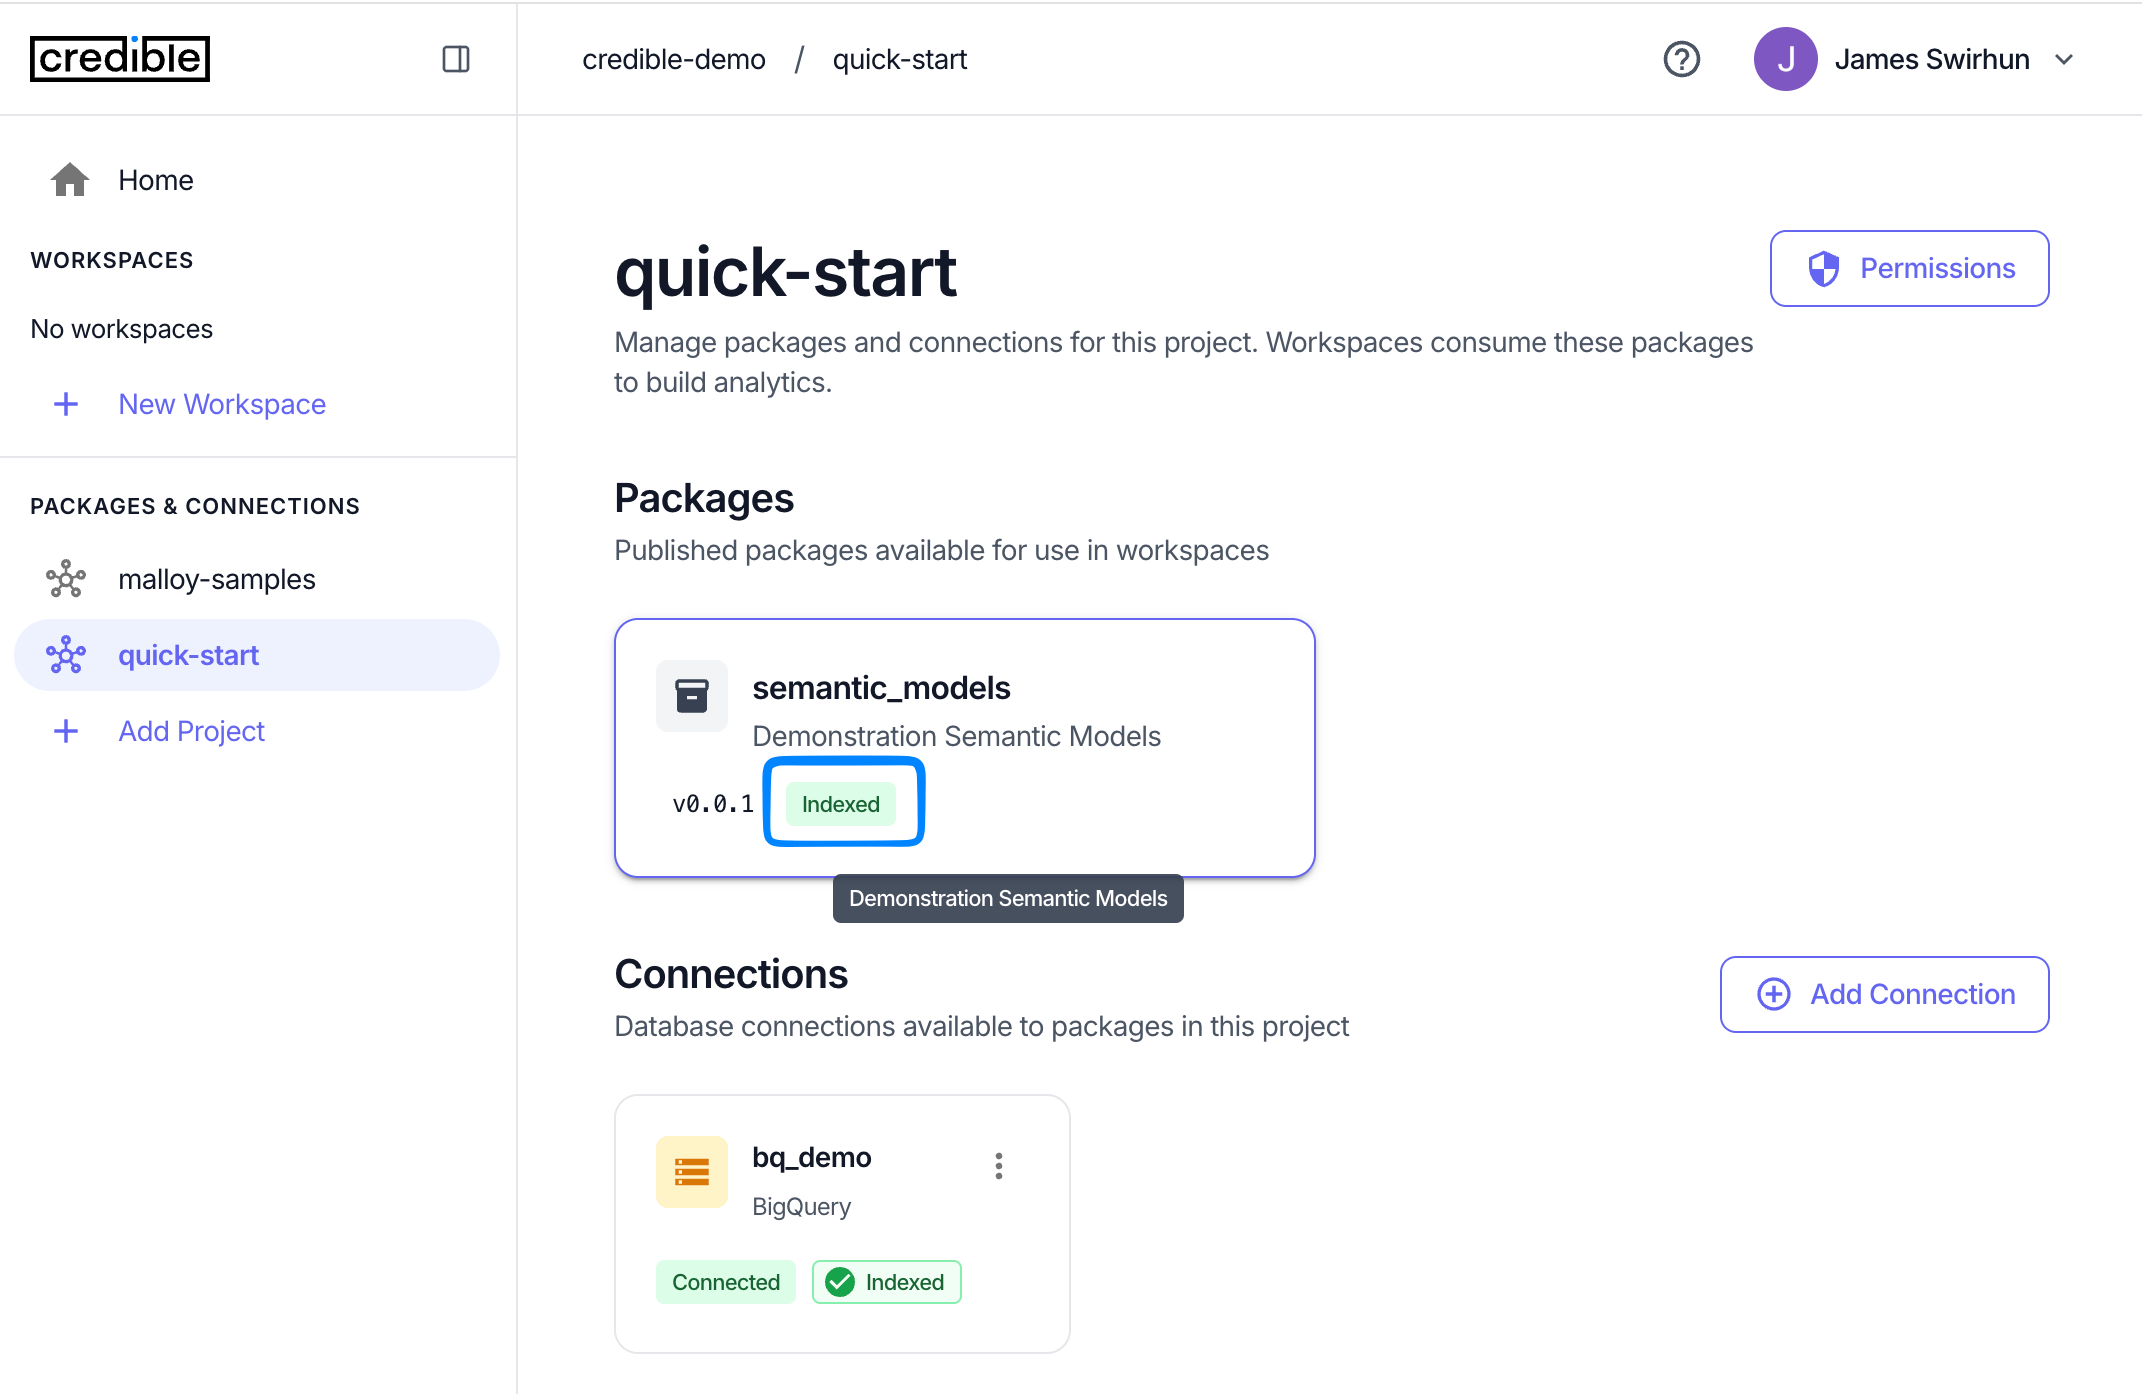 Until indexing completes, `get_context` calls will not return results for the new version. The `execute_query` tool and Data API are available immediately after publishing.
## Next Steps
Now that you've published your models, you can **analyze** your data or **build** applications with your data.
Use the Data Explorer and AI agents to analyze your published models
Build applications and embed analytics using your published models
Until indexing completes, `get_context` calls will not return results for the new version. The `execute_query` tool and Data API are available immediately after publishing.
## Next Steps
Now that you've published your models, you can **analyze** your data or **build** applications with your data.
Use the Data Explorer and AI agents to analyze your published models
Build applications and embed analytics using your published models