> ## Documentation Index
> Fetch the complete documentation index at: https://docs.credibledata.com/llms.txt
> Use this file to discover all available pages before exploring further.
# Connect a Database
> Add secure, managed database connections to your environment
A **connection** is a secure, managed link to a database or warehouse. Connection configurations are stored in a Credible [environment](/how-to/modeling/environment-overview), and every package in that environment can use them. Credentials never leave the Credible service — all access, for modeling and for serving, is proxied through the platform, making Credible a secure perimeter around your databases.
Credible supports **BigQuery, Snowflake, PostgreSQL, Trino, Databricks, MySQL, DuckDB, and MotherDuck**.
## Prerequisites
* **Admin access** to an organization in the Credible platform, in order to create environments and connections. If you don't have it, ask your organization administrator to set up connections for you.
## Setup Process
### Credible App (Recommended)
1. **Access your organization** at `https://your-org.app.credibledata.com`
2. **Select your environment** from the left sidebar under **Packages & Connections**
3. **Click "+ Add Connection"** in the Connections section
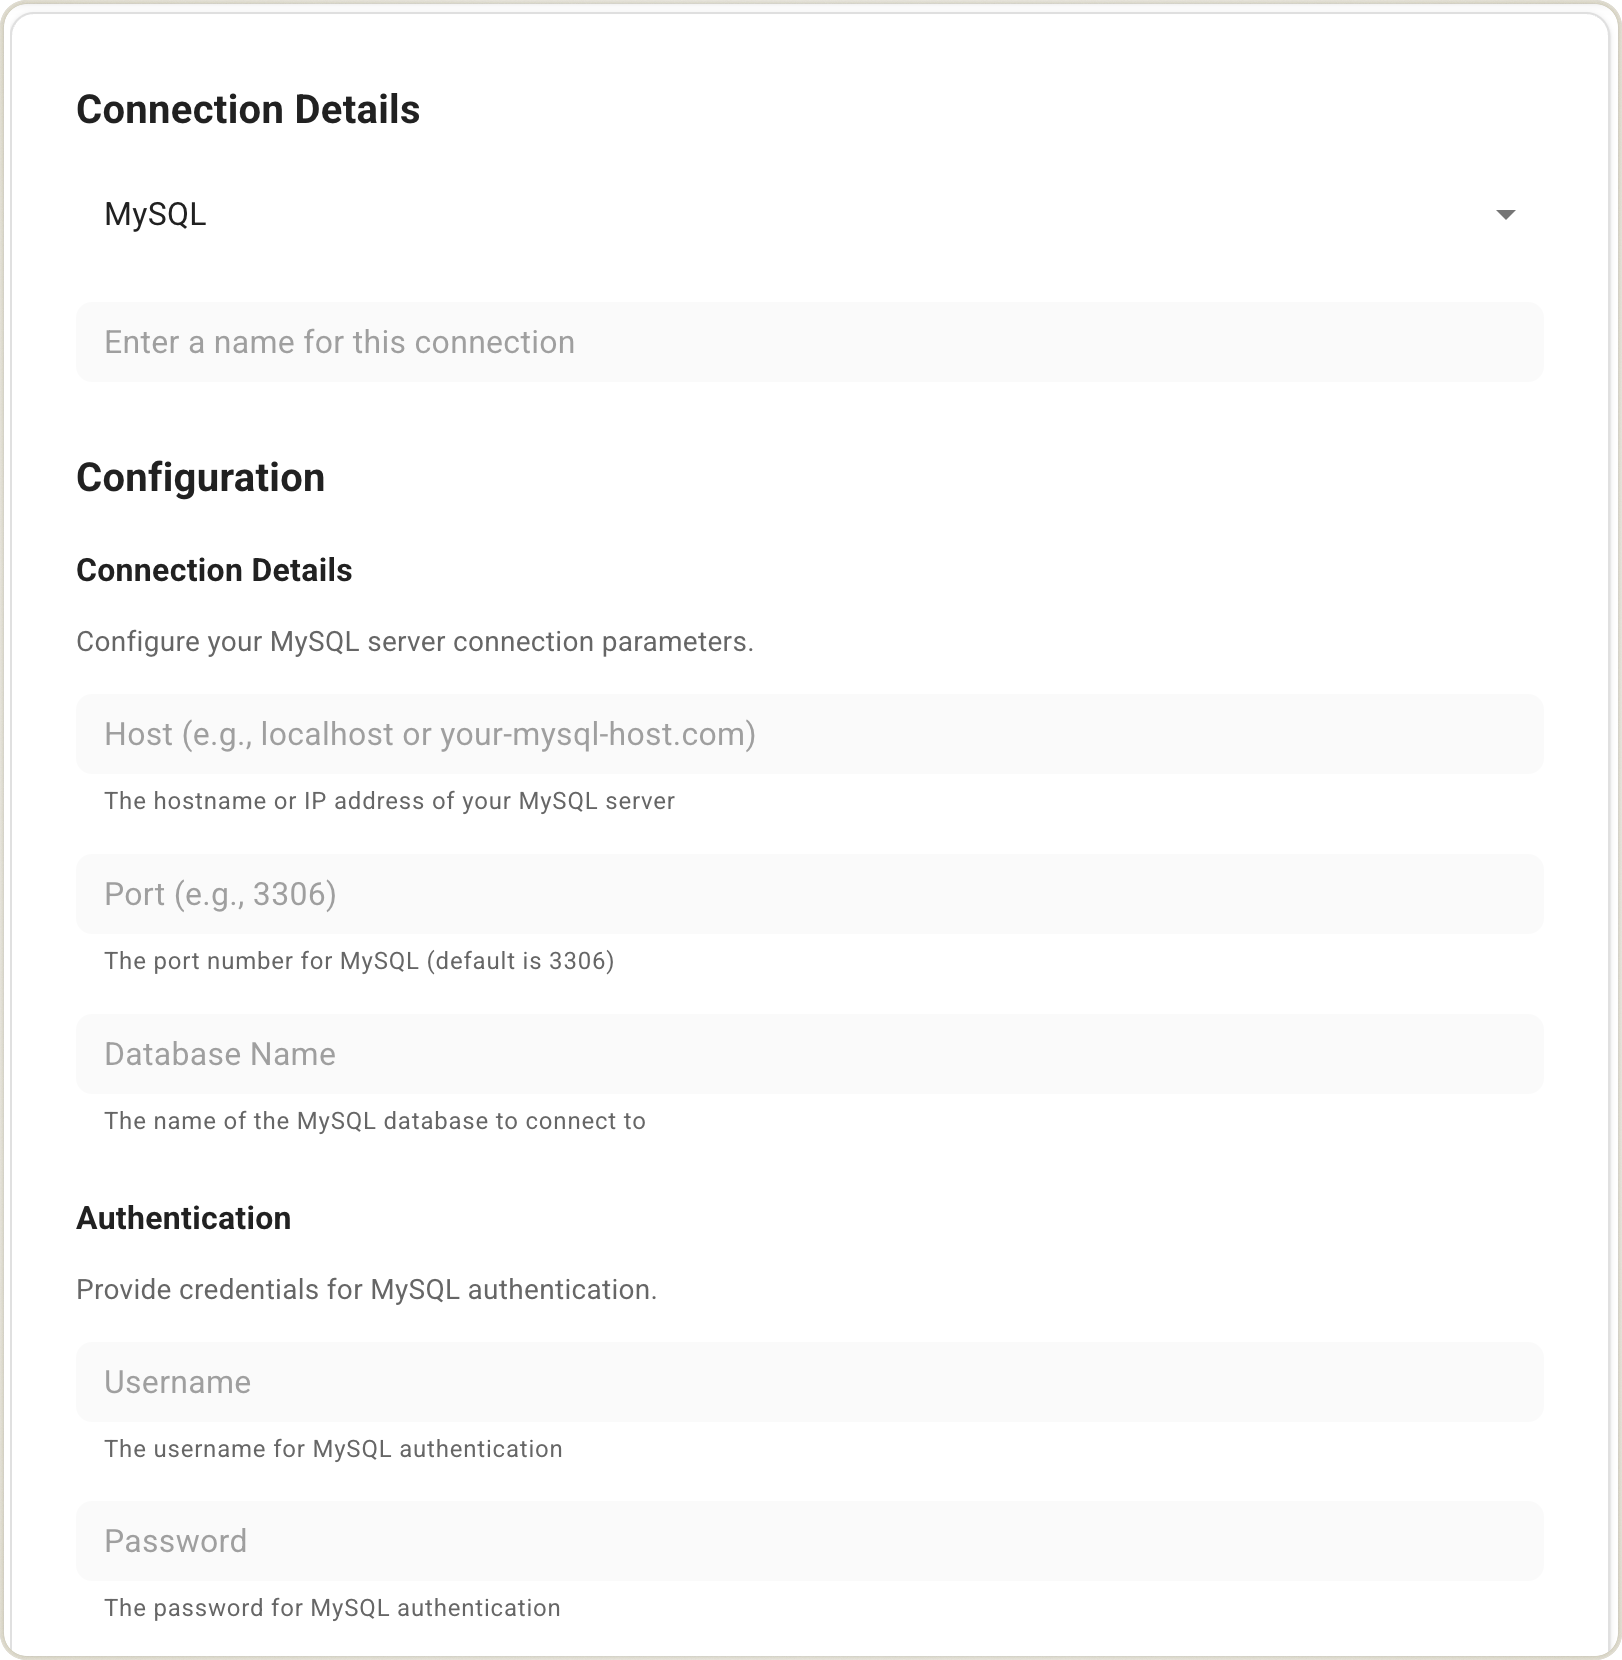
4. **Choose your data source type** and fill in the connection details:
Connection names cannot contain spaces or hyphens. Use underscores instead
(e.g., `my_connection`).
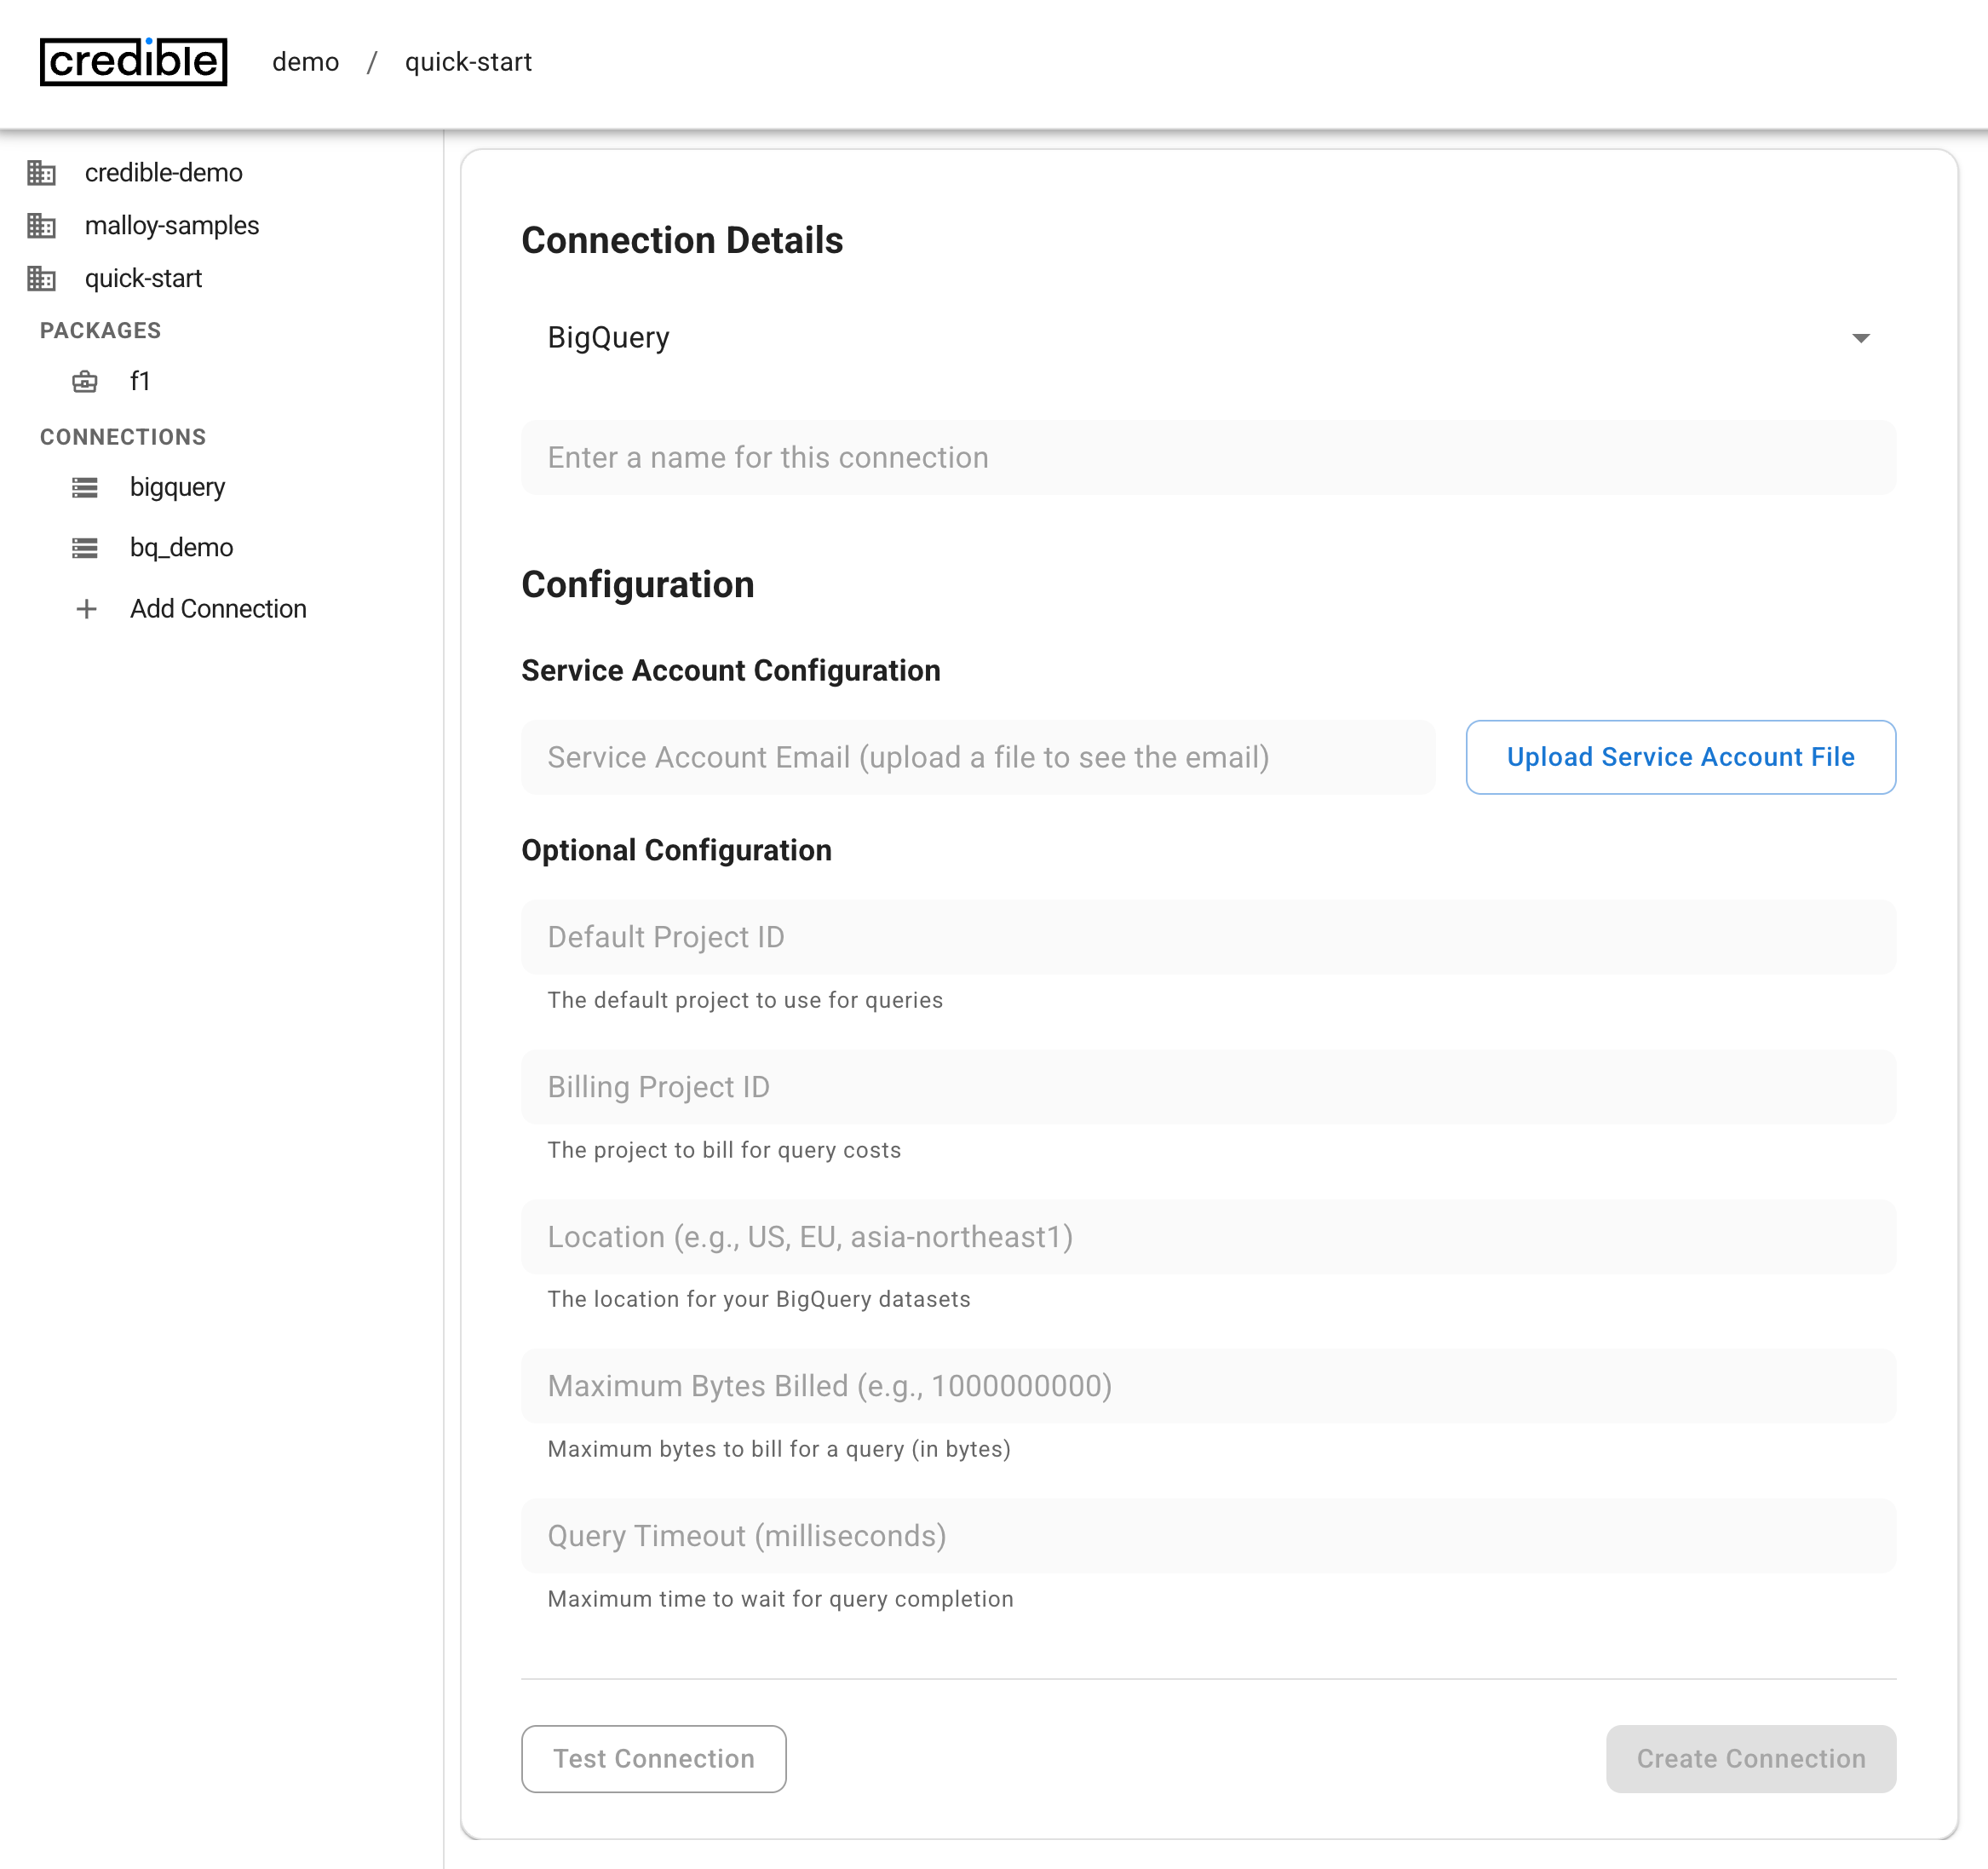
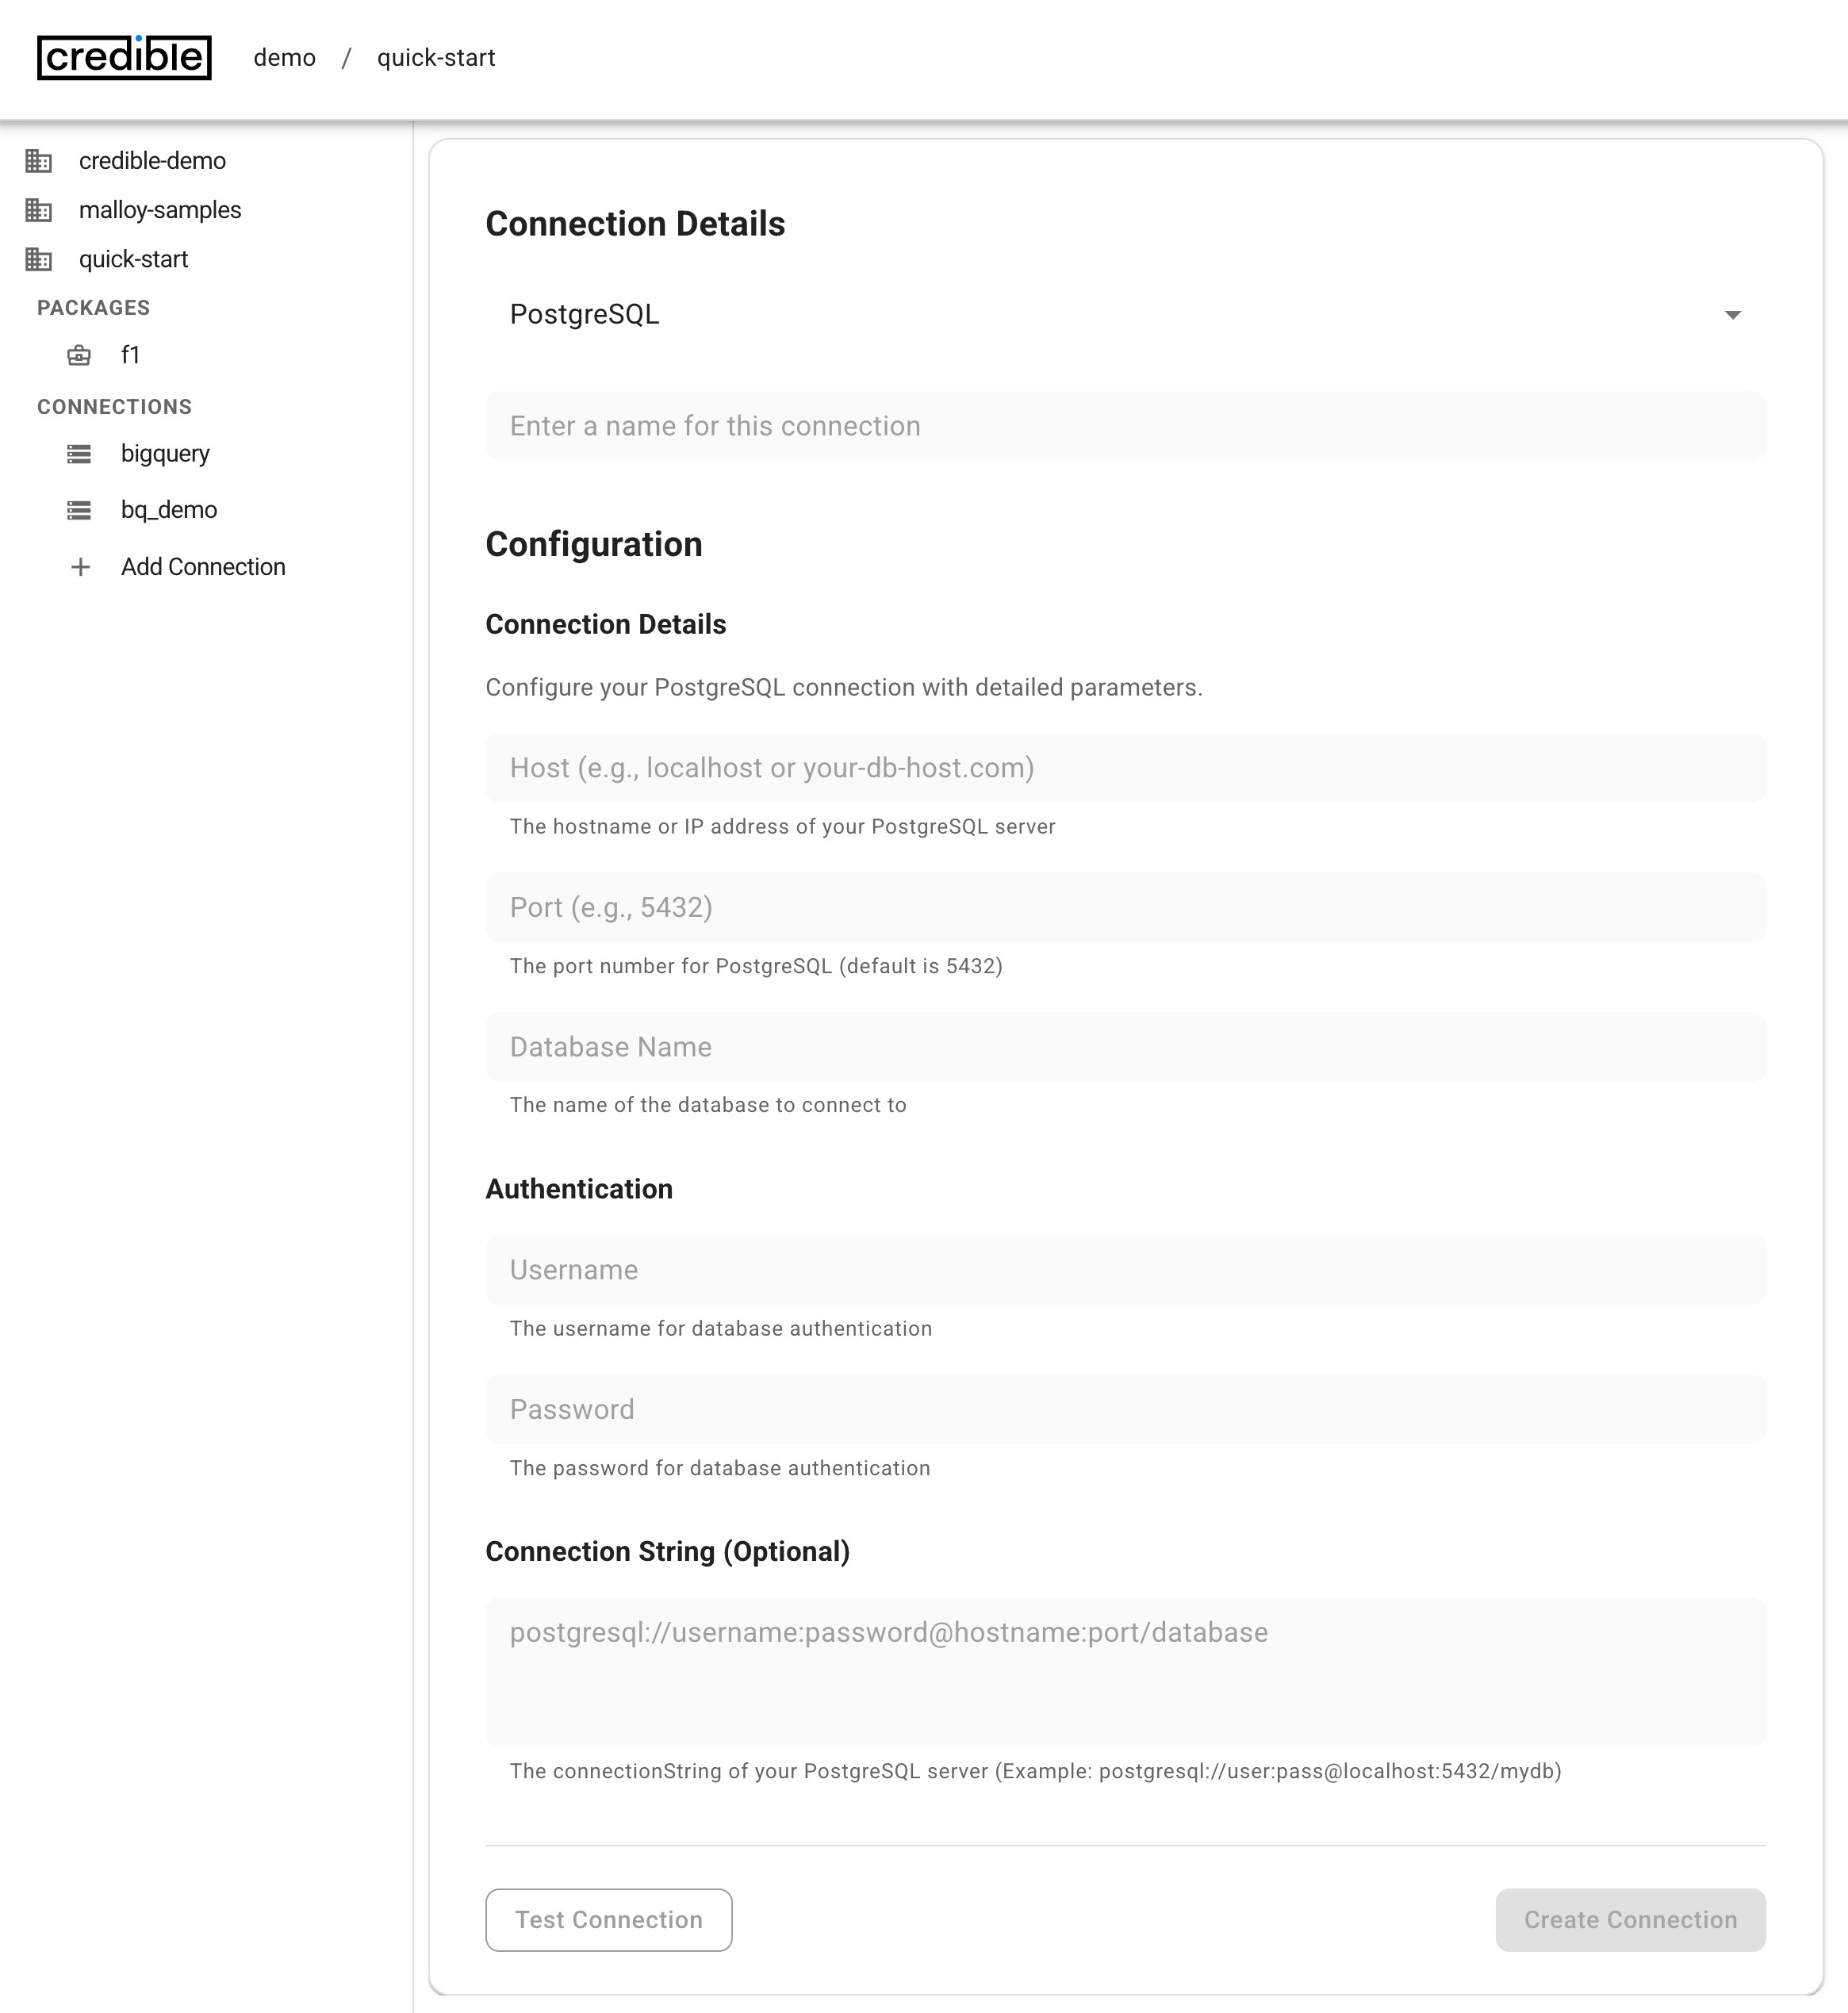
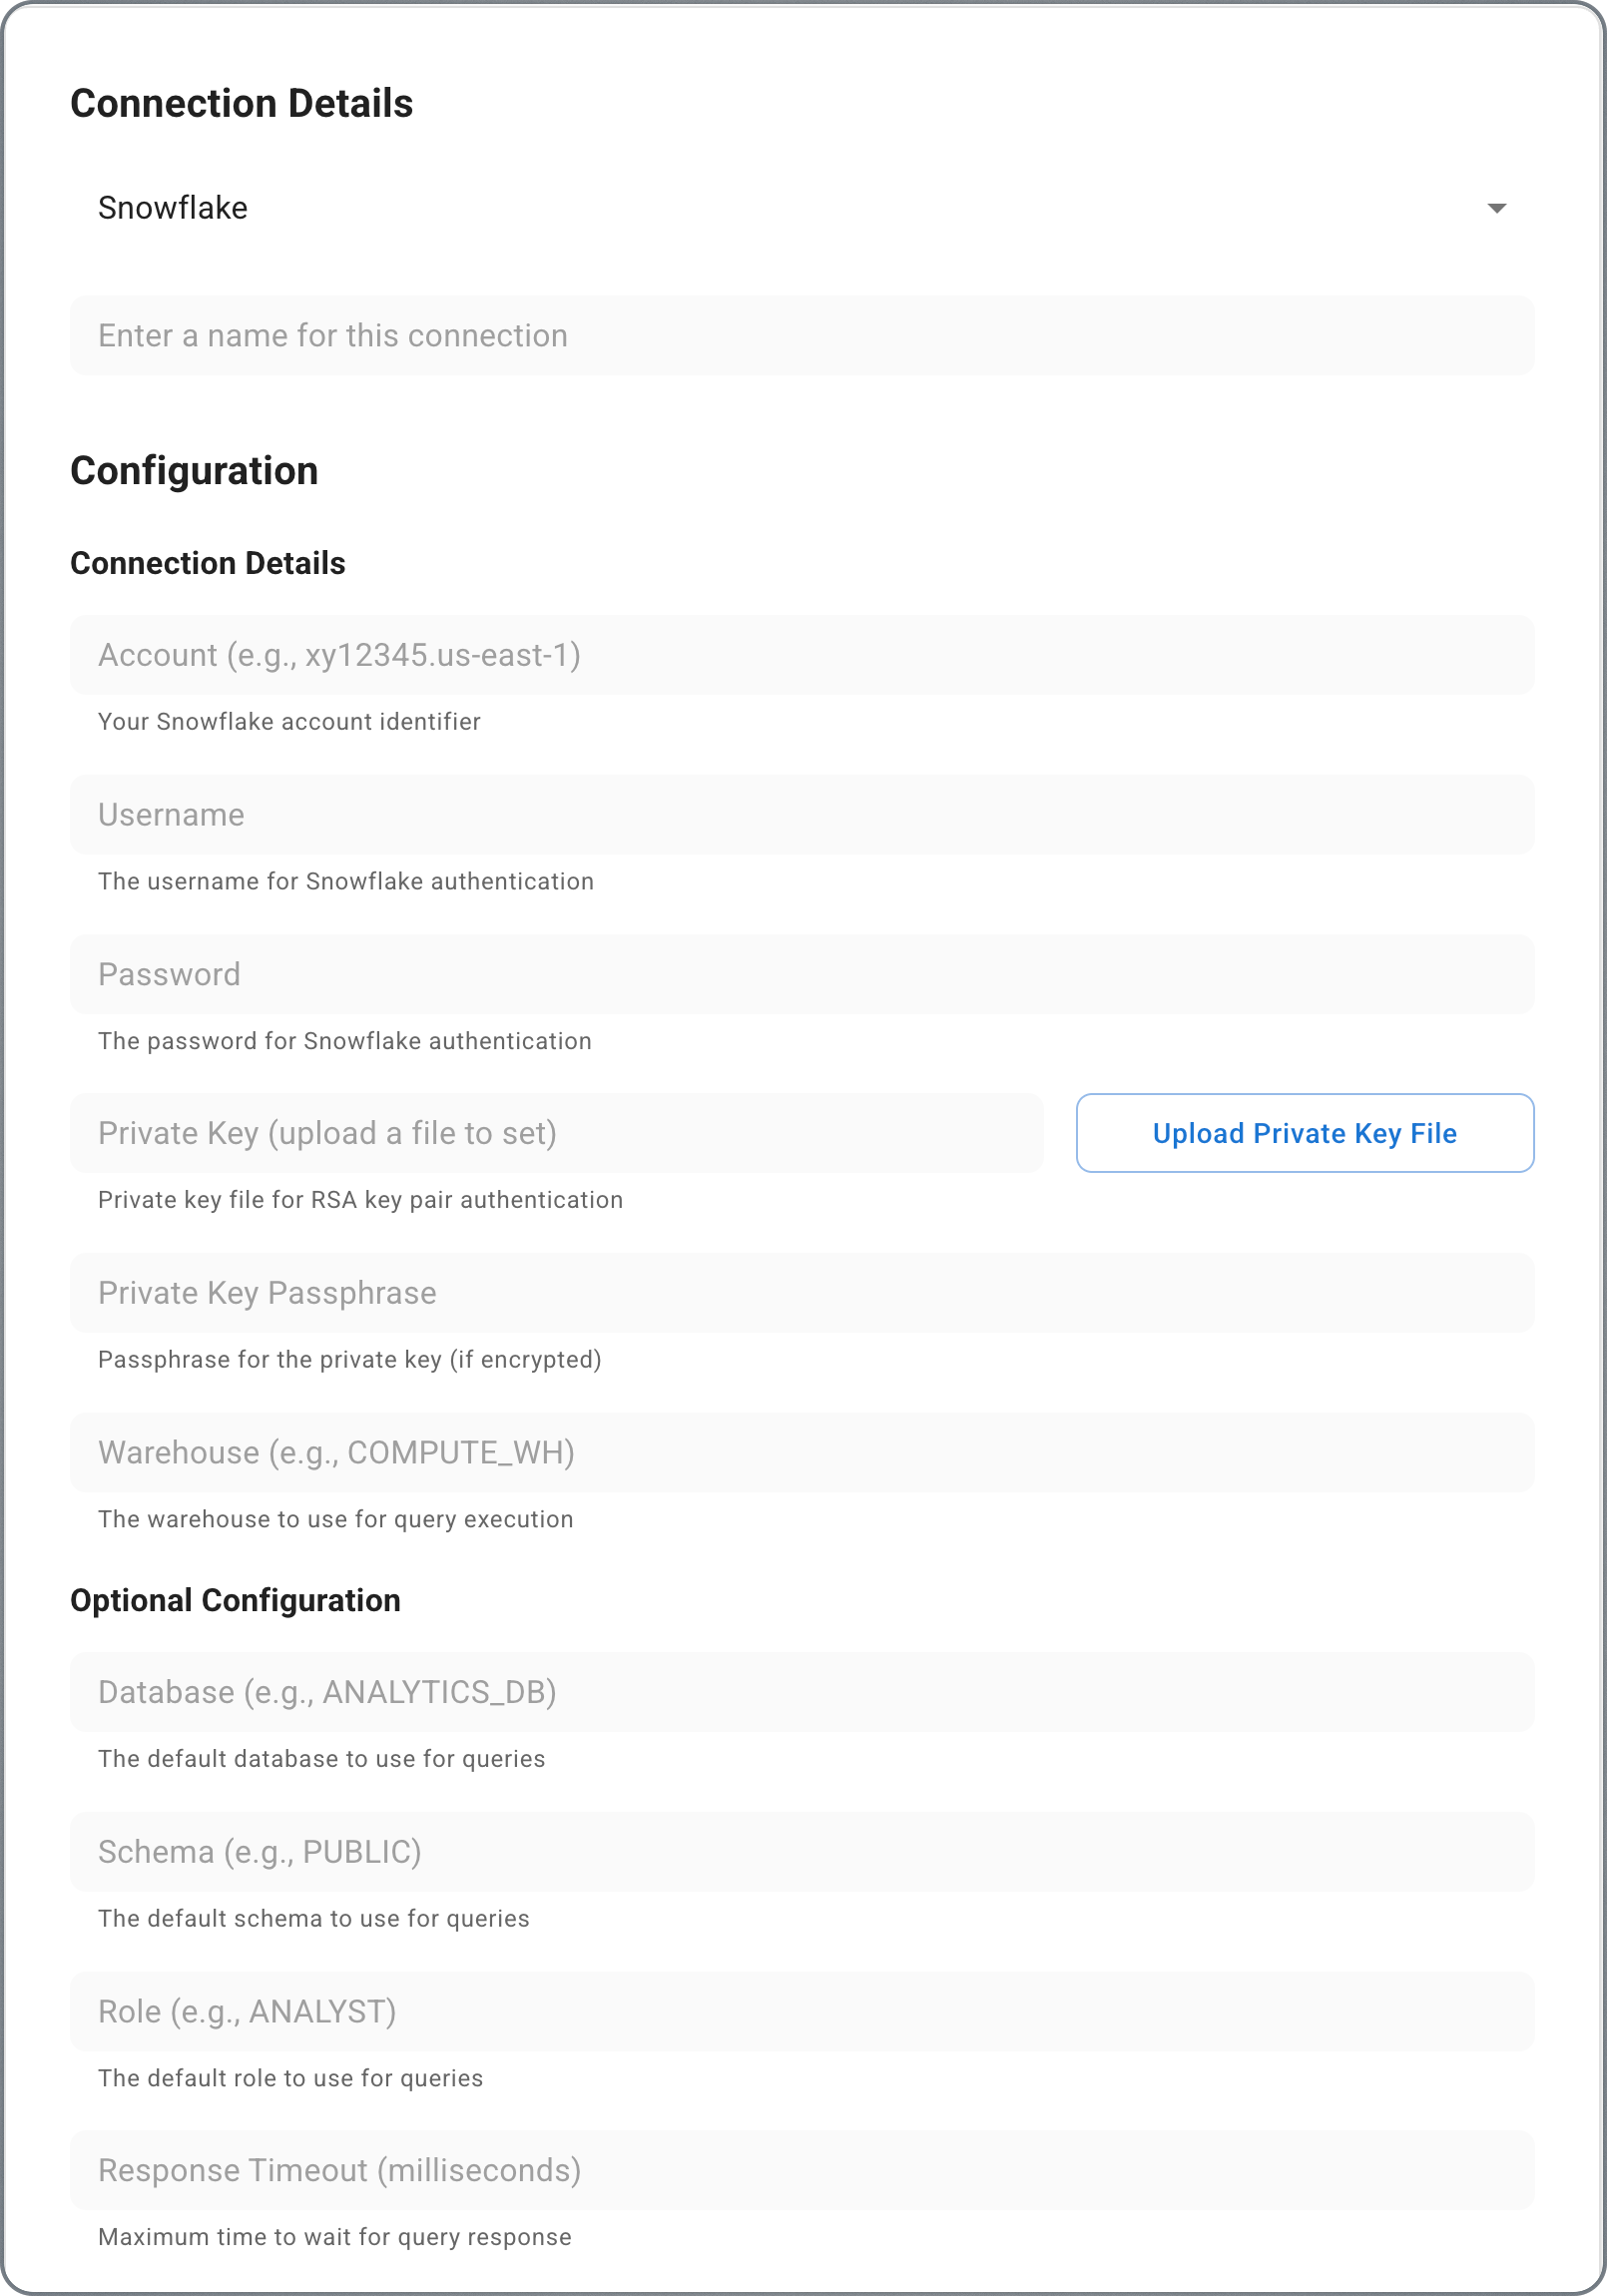
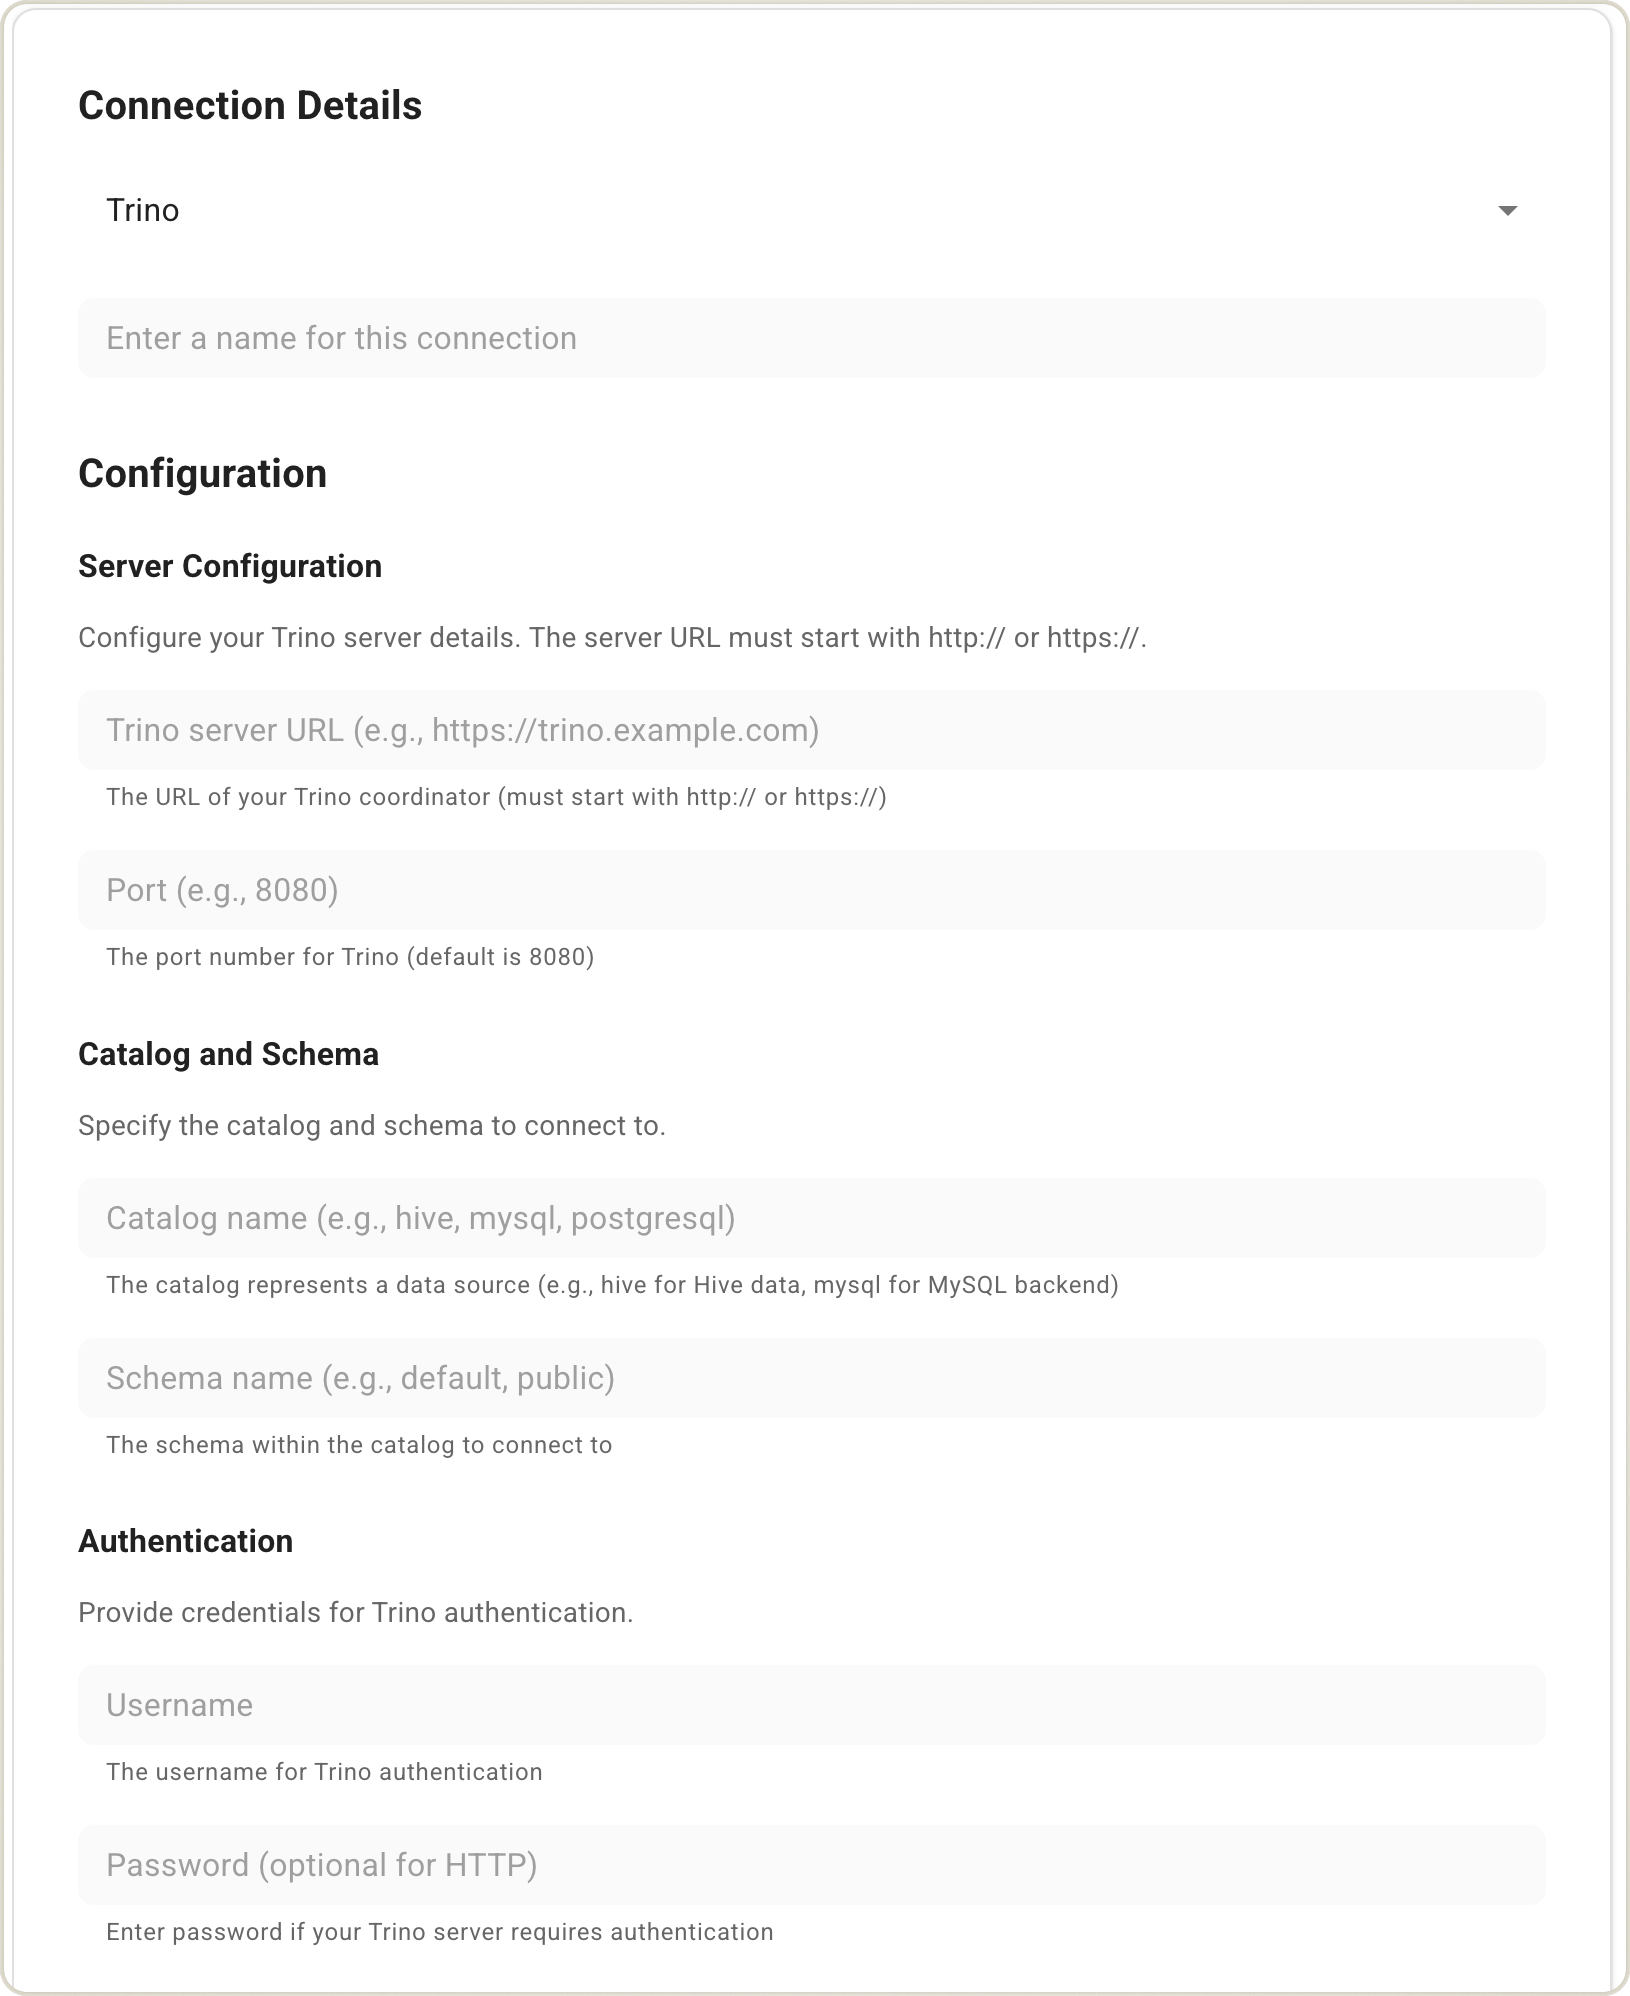 **Required:**
* Connection name
* Host (e.g., `dbc-xxxxxxxx-xxxx.cloud.databricks.com`)
* HTTP Path (e.g., `/sql/1.0/warehouses/`)
* Default Catalog (e.g., `main`)
**Authentication (choose one):**
* **Personal Access Token** - paste a Databricks PAT
* **OAuth M2M** - service principal Client ID + Client Secret
**Optional:**
* Default Schema (e.g., `default`)
See the [Databricks connection reference](/reference/connections/databricks) for details on creating a SQL warehouse, generating a PAT, or configuring an OAuth M2M service principal.
**Required:**
* Connection name
* Host (e.g., `dbc-xxxxxxxx-xxxx.cloud.databricks.com`)
* HTTP Path (e.g., `/sql/1.0/warehouses/`)
* Default Catalog (e.g., `main`)
**Authentication (choose one):**
* **Personal Access Token** - paste a Databricks PAT
* **OAuth M2M** - service principal Client ID + Client Secret
**Optional:**
* Default Schema (e.g., `default`)
See the [Databricks connection reference](/reference/connections/databricks) for details on creating a SQL warehouse, generating a PAT, or configuring an OAuth M2M service principal.
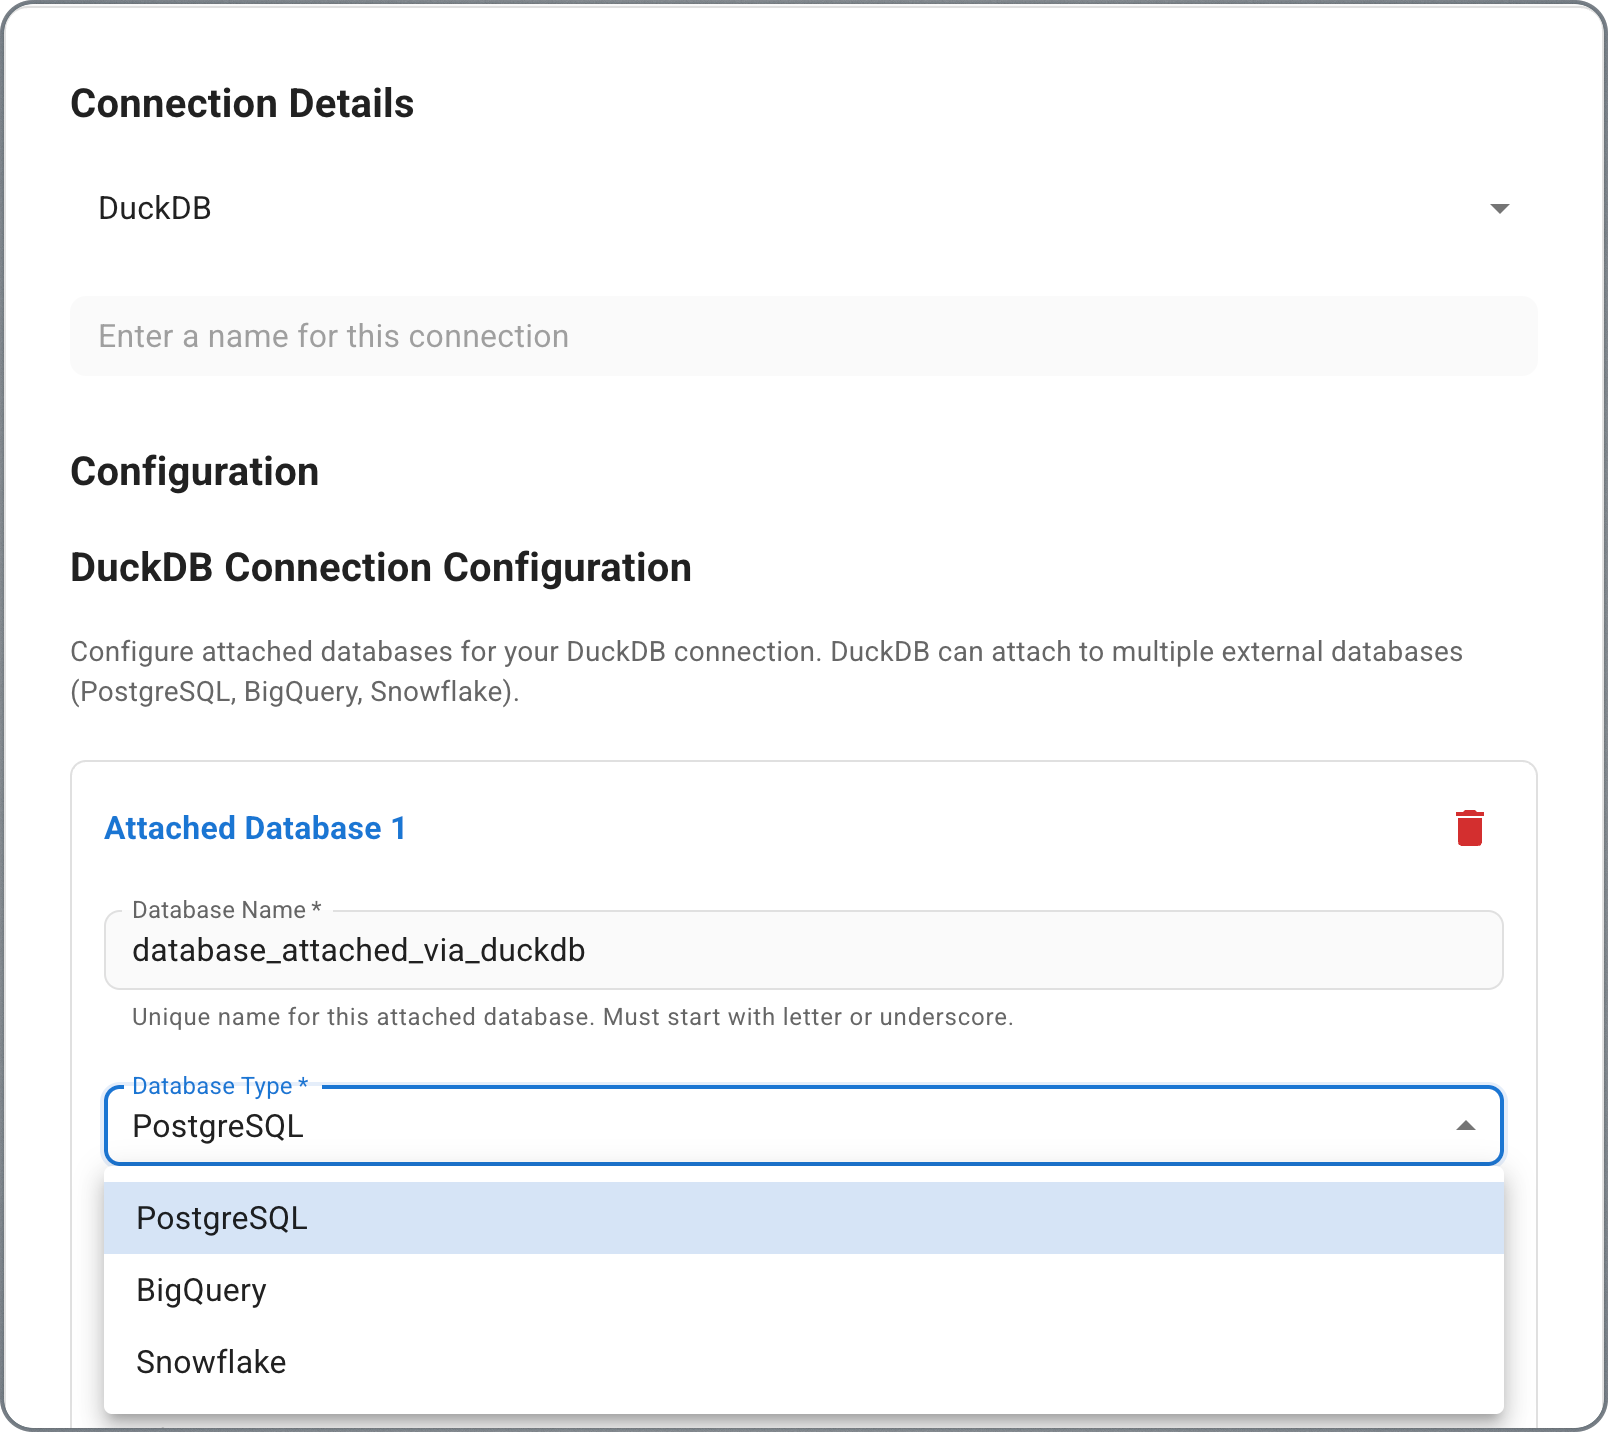 DuckDB connections use an in-process database engine. This is useful for working with embedded data files (CSV, Parquet) included in your packages.
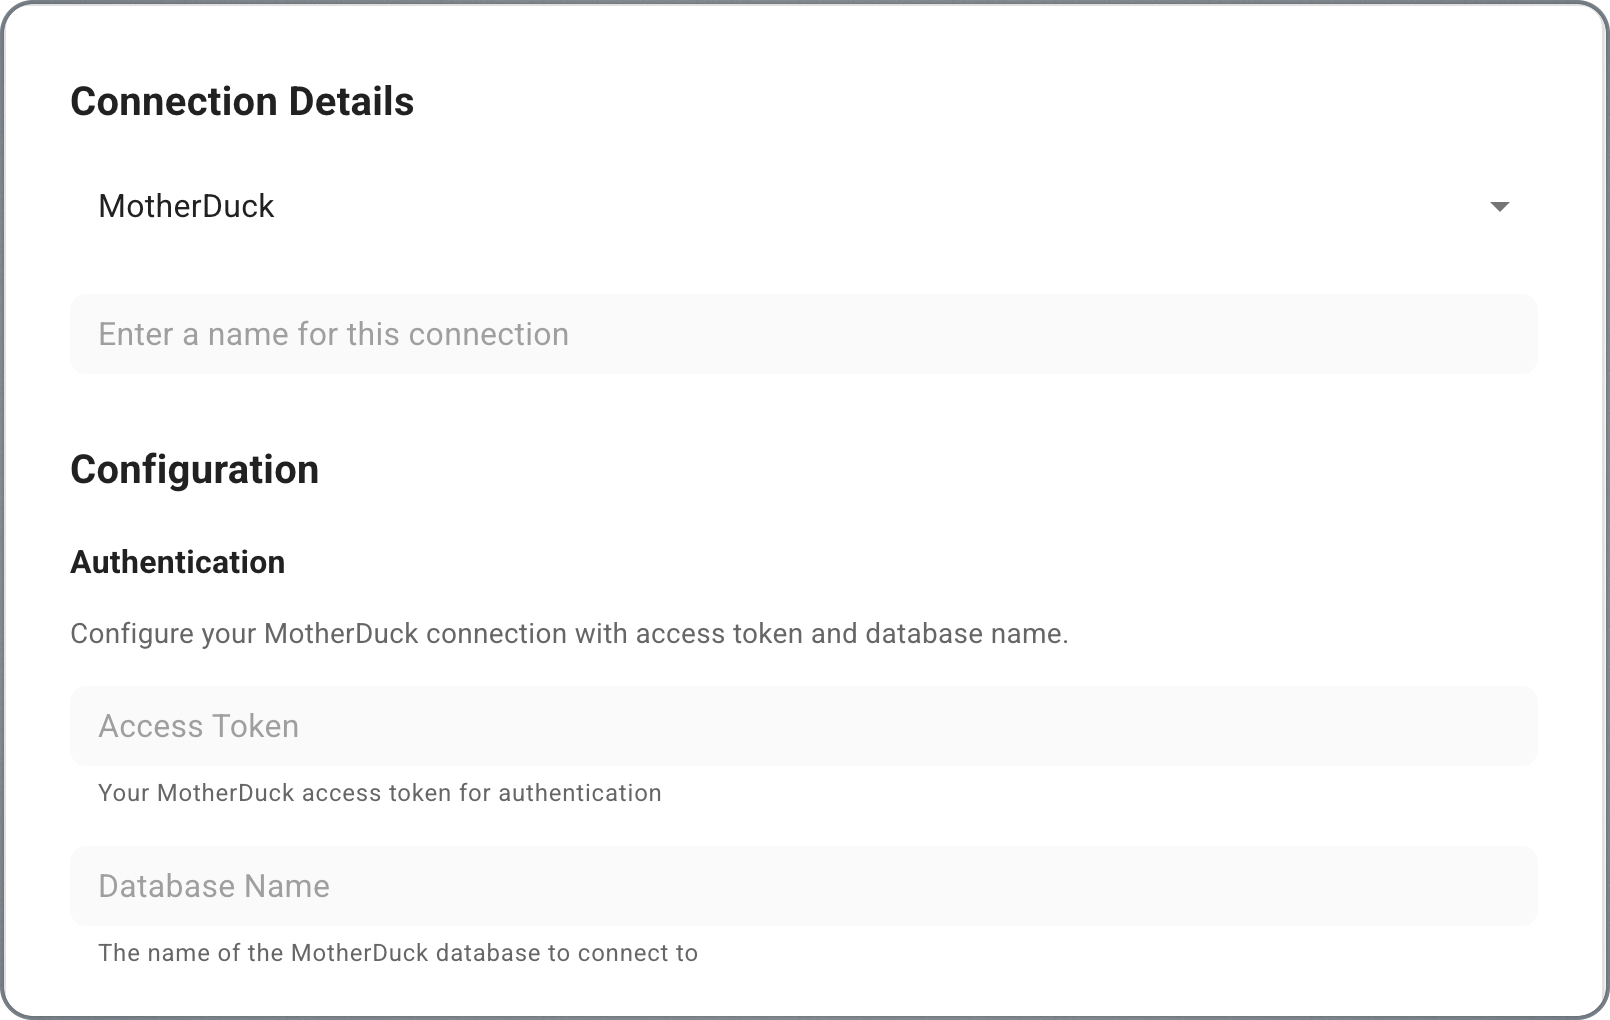 MotherDuck is a serverless cloud analytics platform built on DuckDB. Get your access token from your [MotherDuck account settings](https://app.motherduck.com/).
5. **Test the connection**
6. Click **Next: Configure Scope**
MotherDuck is a serverless cloud analytics platform built on DuckDB. Get your access token from your [MotherDuck account settings](https://app.motherduck.com/).
5. **Test the connection**
6. Click **Next: Configure Scope**
 ### Configure Scope for AI-Assisted Modeling
Next, select which schemas and tables to index for AI-assisted modeling:
### Configure Scope for AI-Assisted Modeling
Next, select which schemas and tables to index for AI-assisted modeling:
 * Browse schemas on the left, select tables on the right
* Use **Select All** to include all tables in a schema, or pick individual tables
* Check **"Do not include any tables for AI-assisted modeling"** if you only need the connection for manual queries
These indexing limits apply to AI-assisted model creation:
* **100 tables per schema** for metadata indexing
* **25 tables or fewer** for automated join inference
You can manually write Malloy models for any size dataset. Published models are indexed separately for analysis.
Click **Update Connection** to save. You'll see an indexing status page confirming the connection is being indexed:
* Browse schemas on the left, select tables on the right
* Use **Select All** to include all tables in a schema, or pick individual tables
* Check **"Do not include any tables for AI-assisted modeling"** if you only need the connection for manual queries
These indexing limits apply to AI-assisted model creation:
* **100 tables per schema** for metadata indexing
* **25 tables or fewer** for automated join inference
You can manually write Malloy models for any size dataset. Published models are indexed separately for analysis.
Click **Update Connection** to save. You'll see an indexing status page confirming the connection is being indexed:
 ### CLI Option
Use the Credible command-line tool for programmatic connection management and automation.
1. **Install the CLI**:
```bash theme={"languages":{"custom":["/languages/motly.tmGrammar.json","/languages/malloy.tmGrammar.json"]}}
npm i -g @credibledata/cred-cli
```
2. **Login to your organization**:
```bash theme={"languages":{"custom":["/languages/motly.tmGrammar.json","/languages/malloy.tmGrammar.json"]}}
cred login
```
3. **Add a connection**:
```bash theme={"languages":{"custom":["/languages/motly.tmGrammar.json","/languages/malloy.tmGrammar.json"]}}
cred add connection
```
The connection file should be a JSON file containing an array of connection objects. See the [CLI reference](/platform-admin/cli) for detailed connection file formats and examples.
4. **Configure scope** (optional): Control which tables are indexed for AI-assisted modeling with scope flags on `cred add connection`. Tables are referenced as `{dataset/schema}.{table}`, and `*` matches all tables in a schema:
```bash theme={"languages":{"custom":["/languages/motly.tmGrammar.json","/languages/malloy.tmGrammar.json"]}}
# Index only the sales schema and one finance table
cred add connection connections.json --include-tables "sales.*,finance.orders"
# Index everything except temporary and backup data
cred add connection connections.json --exclude-tables "temp_data.*,backup.records"
# Create the connection without indexing any tables
cred add connection connections.json --skip-indexing
```
`--include-tables` and `--exclude-tables` are mutually exclusive (and cannot be combined with `--skip-indexing`).
Scope flags apply at connection creation. To change the scope of an existing connection, edit it in the Credible App (see [Configure Scope](#configure-scope-for-ai-assisted-modeling) above).
## Next Steps
With your data connected, pick how you want to build models:
Build models with the agent in your browser — no setup, recommended to start
Build in your IDE with your preferred coding agent
### CLI Option
Use the Credible command-line tool for programmatic connection management and automation.
1. **Install the CLI**:
```bash theme={"languages":{"custom":["/languages/motly.tmGrammar.json","/languages/malloy.tmGrammar.json"]}}
npm i -g @credibledata/cred-cli
```
2. **Login to your organization**:
```bash theme={"languages":{"custom":["/languages/motly.tmGrammar.json","/languages/malloy.tmGrammar.json"]}}
cred login
```
3. **Add a connection**:
```bash theme={"languages":{"custom":["/languages/motly.tmGrammar.json","/languages/malloy.tmGrammar.json"]}}
cred add connection
```
The connection file should be a JSON file containing an array of connection objects. See the [CLI reference](/platform-admin/cli) for detailed connection file formats and examples.
4. **Configure scope** (optional): Control which tables are indexed for AI-assisted modeling with scope flags on `cred add connection`. Tables are referenced as `{dataset/schema}.{table}`, and `*` matches all tables in a schema:
```bash theme={"languages":{"custom":["/languages/motly.tmGrammar.json","/languages/malloy.tmGrammar.json"]}}
# Index only the sales schema and one finance table
cred add connection connections.json --include-tables "sales.*,finance.orders"
# Index everything except temporary and backup data
cred add connection connections.json --exclude-tables "temp_data.*,backup.records"
# Create the connection without indexing any tables
cred add connection connections.json --skip-indexing
```
`--include-tables` and `--exclude-tables` are mutually exclusive (and cannot be combined with `--skip-indexing`).
Scope flags apply at connection creation. To change the scope of an existing connection, edit it in the Credible App (see [Configure Scope](#configure-scope-for-ai-assisted-modeling) above).
## Next Steps
With your data connected, pick how you want to build models:
Build models with the agent in your browser — no setup, recommended to start
Build in your IDE with your preferred coding agent